Sagittarius


In some ways this was a surprisingly smooth build process for me, which I mostly attribute to it being one of my first non-contest, long-deadline builds in a long time. My building the past several years has been almost entirely centered around Bio-cup and the stresses that brought probably weren’t very healthy.
That’s a long way of saying that I quite enjoyed building this one and I’m proud of the result.
This build started when I was approached by the magnificent Woomy World at Brickfair Nova 2023 to join the Zodiac collab that had been dragging for far too long already after multiple dropouts. Of the options remaining at the time, I felt Sagittarius was the best pick for my build style. I didn’t want to try something too far outside my wheelhouse in my very first collab, just building something I felt was worthy of all the other great builders involved was going to be tough enough so I wanted to avoid too much experimentation. A centaur with a bow was a simple concrete image that I didn’t have to flex too much creativity with.
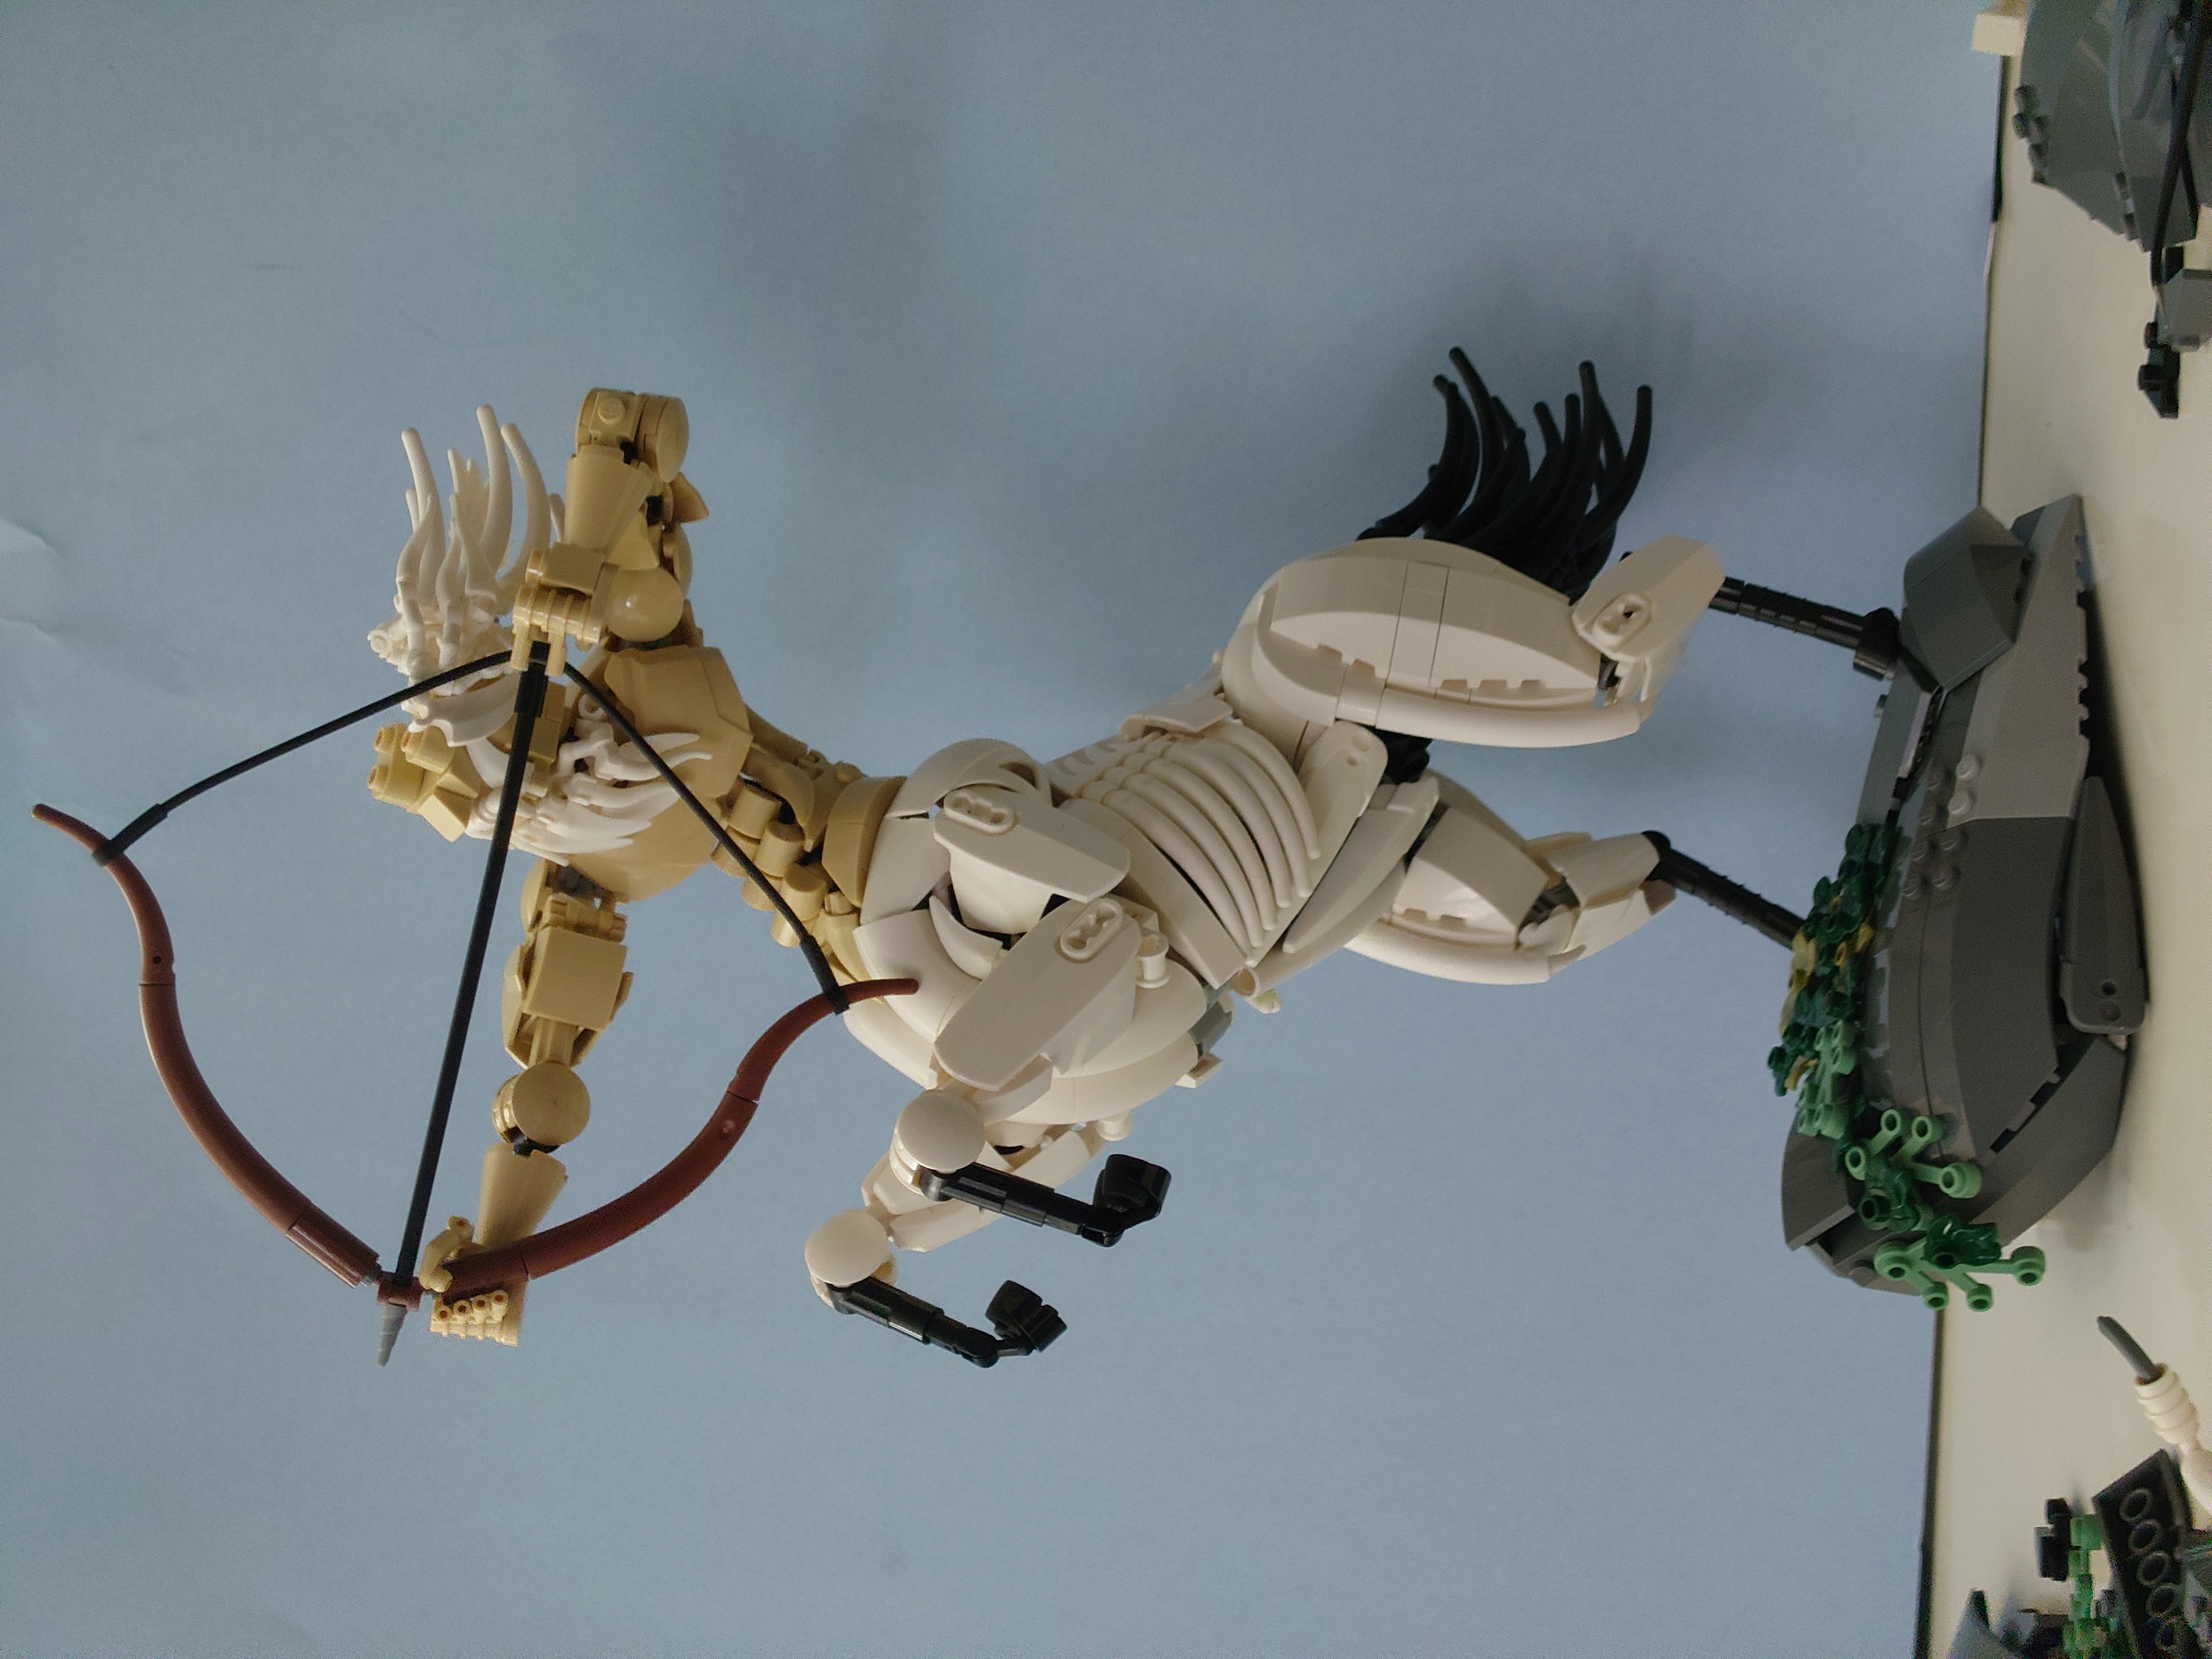
As with most of my MOCs, I began by searching for references. I initially assumed a simple standing pose with one front leg up and bent, with the human torso twisted to shoot behind the horse body. That would show off the whole MOC well with a touch of dynamics with the drawn bow. But then I came across this little sculpture of a rearing centaur archer (available on Amazon if you want it!) and I knew I had to try it. So wonderfully dynamic! Trying to achieve the illusion of movement in MOCs had been a recent staple in my idle dreaming so this was perfect opportunity.
I knew from the get-go that freedom of movement was a no-go. This would have to be a statue if I wanted to achieve such a precarious pose at the scale I would aim for. Center of gravity would not be over the hind hooves and joints would not be able to hold up against gravity. That was all well and good, but I knew two of the biggest challenges would be achieving the ab twist and crunch on the human part and the human to horse transition area, so I started the build right there.
The big macs seemed a natural choice for the horse chest musculature, with the big barbs serving as the bottom human abs splitting them. Funny enough, this very first choice of parts led to a departure from proper horse proportional anatomy due to the width they forced between the front legs, and width continues to to be a bit of a problem throughout the rest of the horse torso. But let's let that slide, the front legs as a whole are a bit iffy anatomically. Slizer visors have a similar texture and fit nicely with the big macs to continue that shape up over the horse shoulder. I’m pretty proud of how a lot of the parts in the horse body come together, but rather than note each one I’ll simply say that all part choices for the rest of the horse body were a consequence this first assembly and the shapes it left.
The human abs were also an easy choice, but twisting them was less so. I initially tried to use flex tubes and actually twist the core for solid and “real” twist, but after a brief struggle I gave up on that and just went with clipping the abs onto parallel straight bars, with the twist achieved in a rather inelegant manner. I also didn’t have much in the way of connection points, so I just kinda stacked the ab structure onto the navel with no genuine connection, they just get locked in by the all the parts around them, for a loose definition of “locked.” Then, rather than try to build a nice set of pecs, the prefab hero chest was made for this situation. A notional front horse leg was also tacked on to get a feel for the pose and scale.
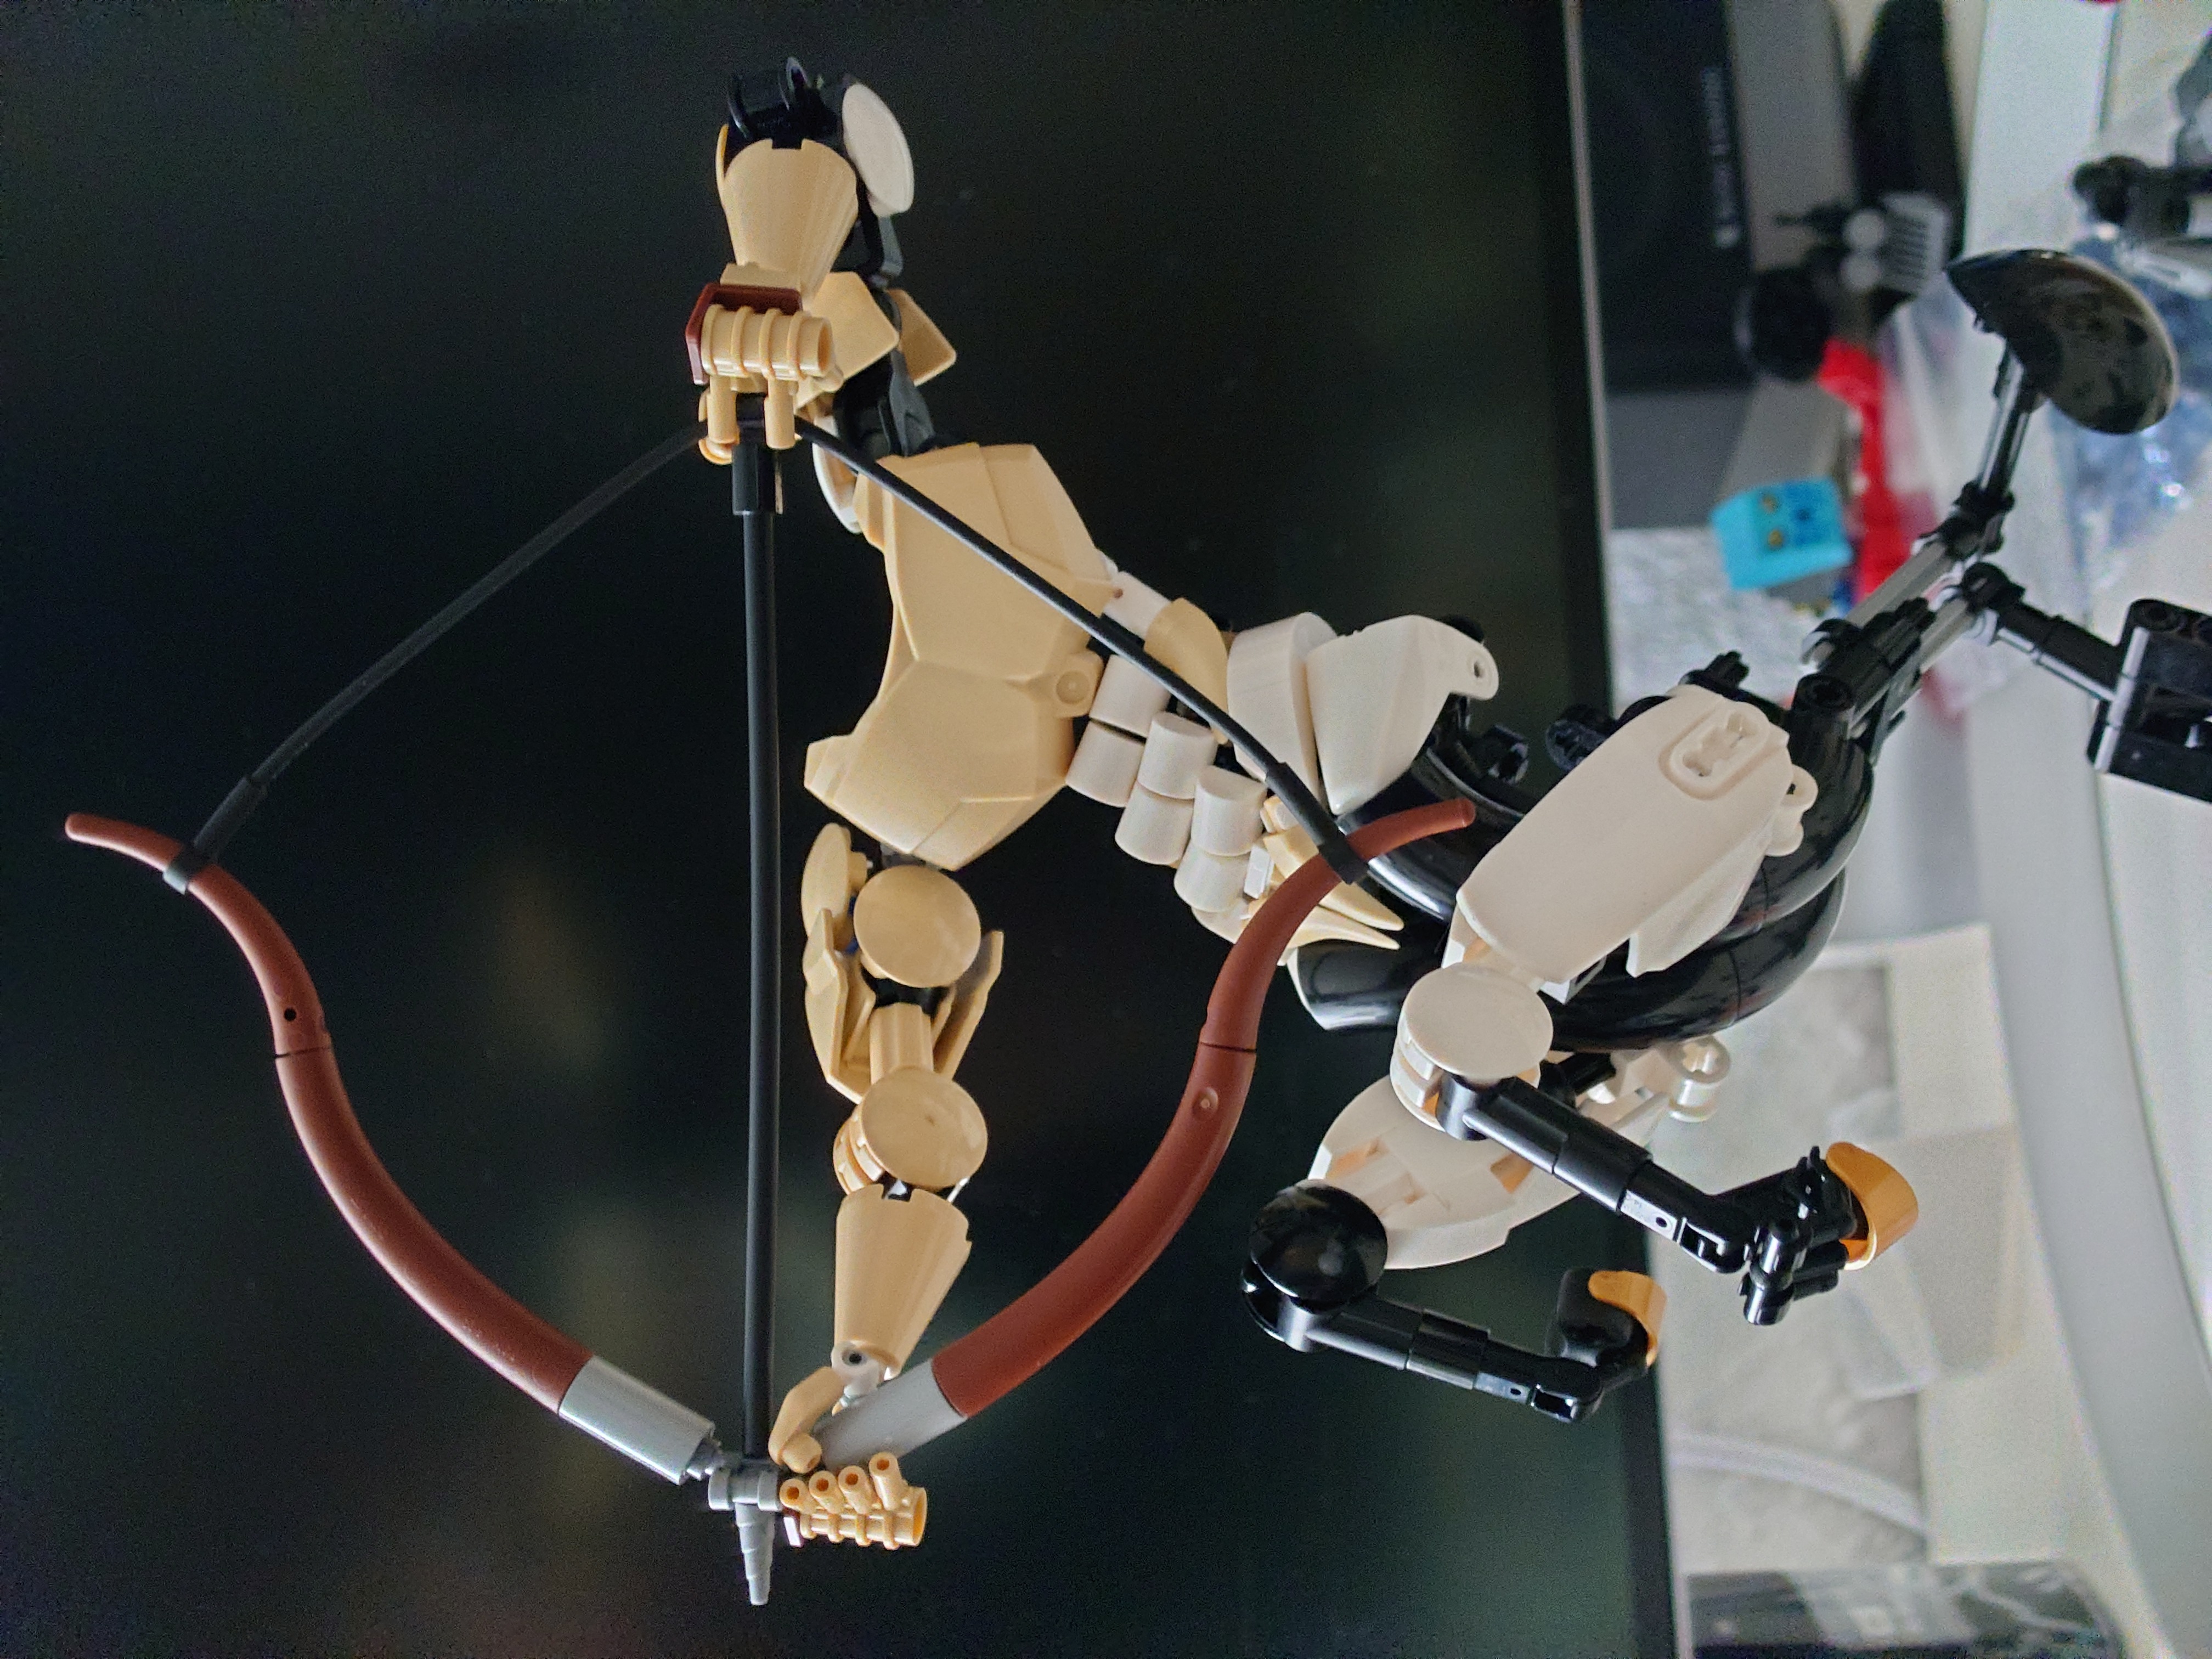
Since the bow is an important focal point, I made sure that I had a decent design for that at this point as well, with some notional arms thrown on to help me envision things. I should note that the upper torso is really only composed of the chest plate at this point, anything behind that was temporary haphazard structure to support arms that were themselves not final.
Rather than finalize the human part or work my way backwards from the horse shoulders, I instead opted to build out the core and leg frames to finalize the pose for the horse section. Building a statue, I wanted to build to the pose which meant I needed the final stance done before I could continue on the horse body. So I built up the stand and static legs at the angle I wanted, and put each hip on two ball joints. The ball joints seemed like the easiest way to achieve the angle there, especially since I wanted each leg to be at a slightly different angle for a more natural look. Four joints in a row was a bit bulkier than I’d like, but I needed the strength to hold up the cantilevered body. Four sockets ended up being barely enough.
Legs were pretty standard shaping, though I had made my life a bit more complicated by setting the knees at right angles, which was not the angle I wanted visible. I made it work. I actually don’t love the thighs/hips in general here, there’s a small gap between the big arches on the back and the sloped wedges (and the arches don’t fully connect to the studs due to unfortunate geometry), and the dino tail mid sections were only intended as a stopgap solution when I noticed I didn’t give enough volume on the front of the thighs.
Before filling out all the in-betweens, I went back to the human part as I was worried about the head. To get to the head I had to fill the chest a bit so that I’d know what the neck area would look like and used the opportunity to get the shoulder joints done, too. This was all relatively straightforward, though the tails and barbs used for the obliques and lats are a bit finicky.
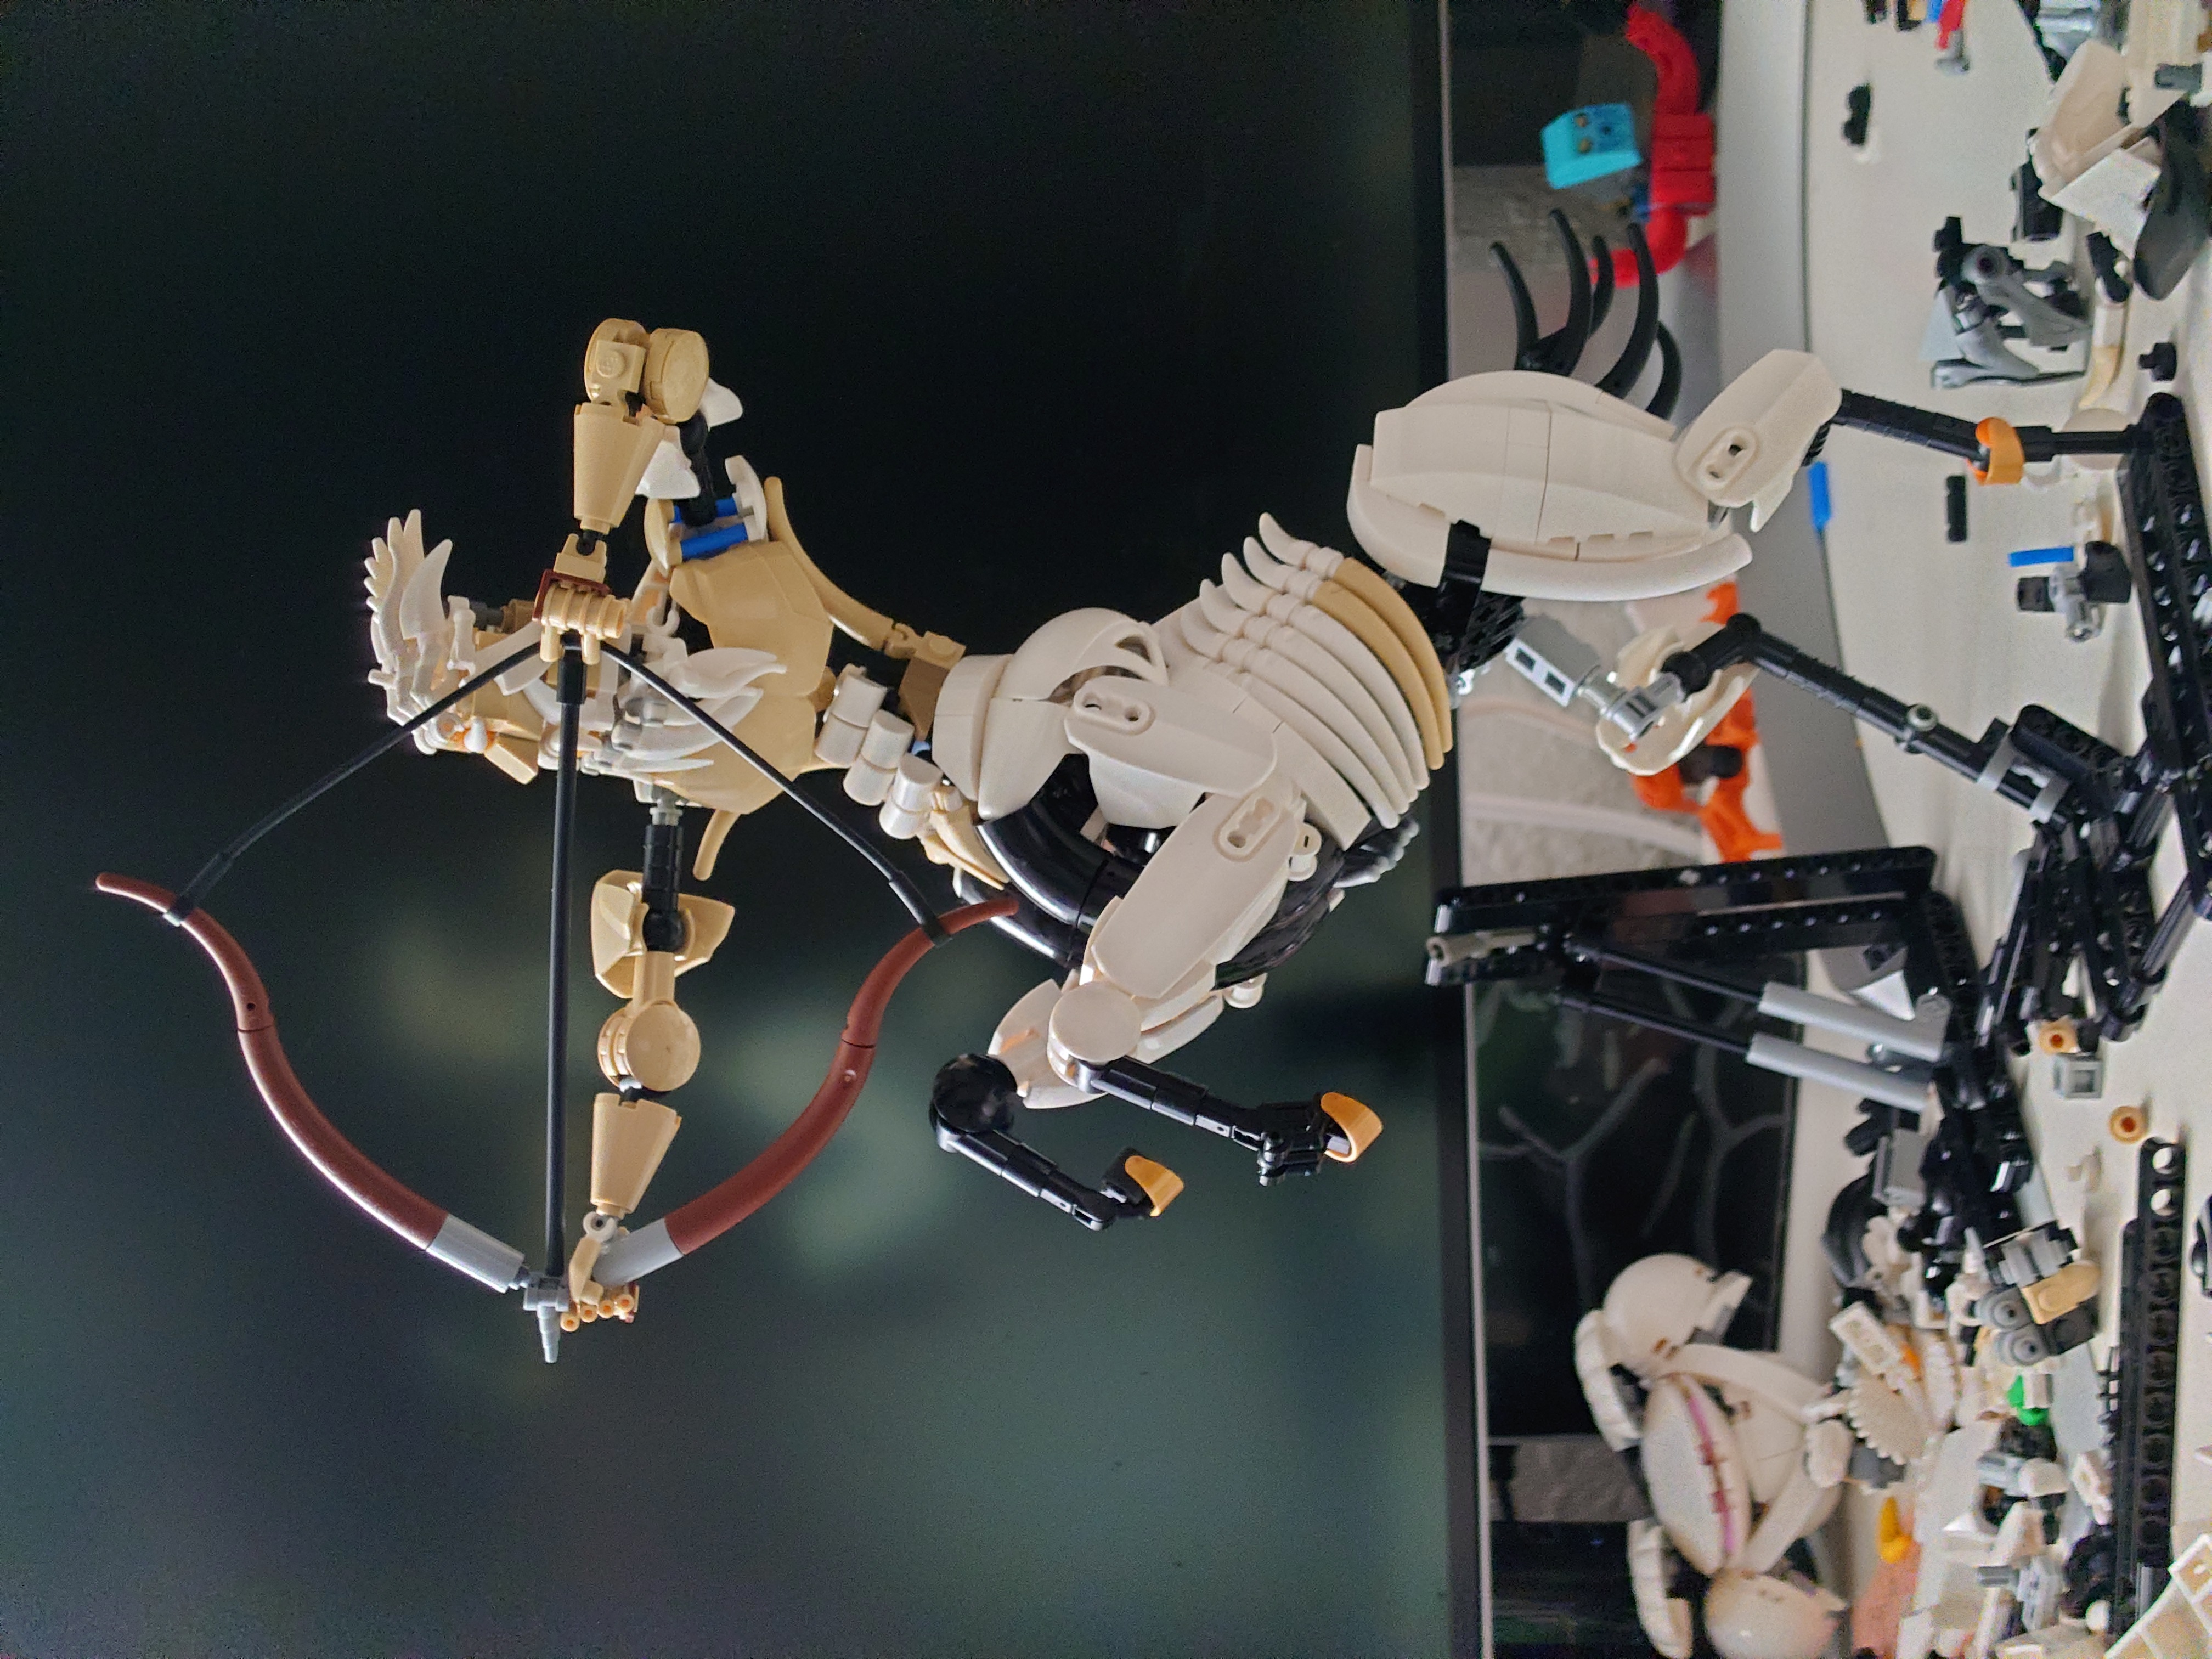
Now, up to this point in my building career I had made a very deliberate effort to avoid building humans, and even more so to avoid building human faces, if I could help it because I frankly don’t particularly like even the best attempts from better builders than I. But Eero Ookonen has the best examples I can think of, so I pulled liberally (read: stole) from him and went on my merry way. I couldn’t quite copy him wholesale because this is a slightly smaller scale than his models nor did I have as much practice as him, but it worked out adequately, I think. The hair does a decent job of obscuring most of the hard right angles, I think. And big flowing hair was absolutely necessary both to sell the motion and to sell the drama of the pose.
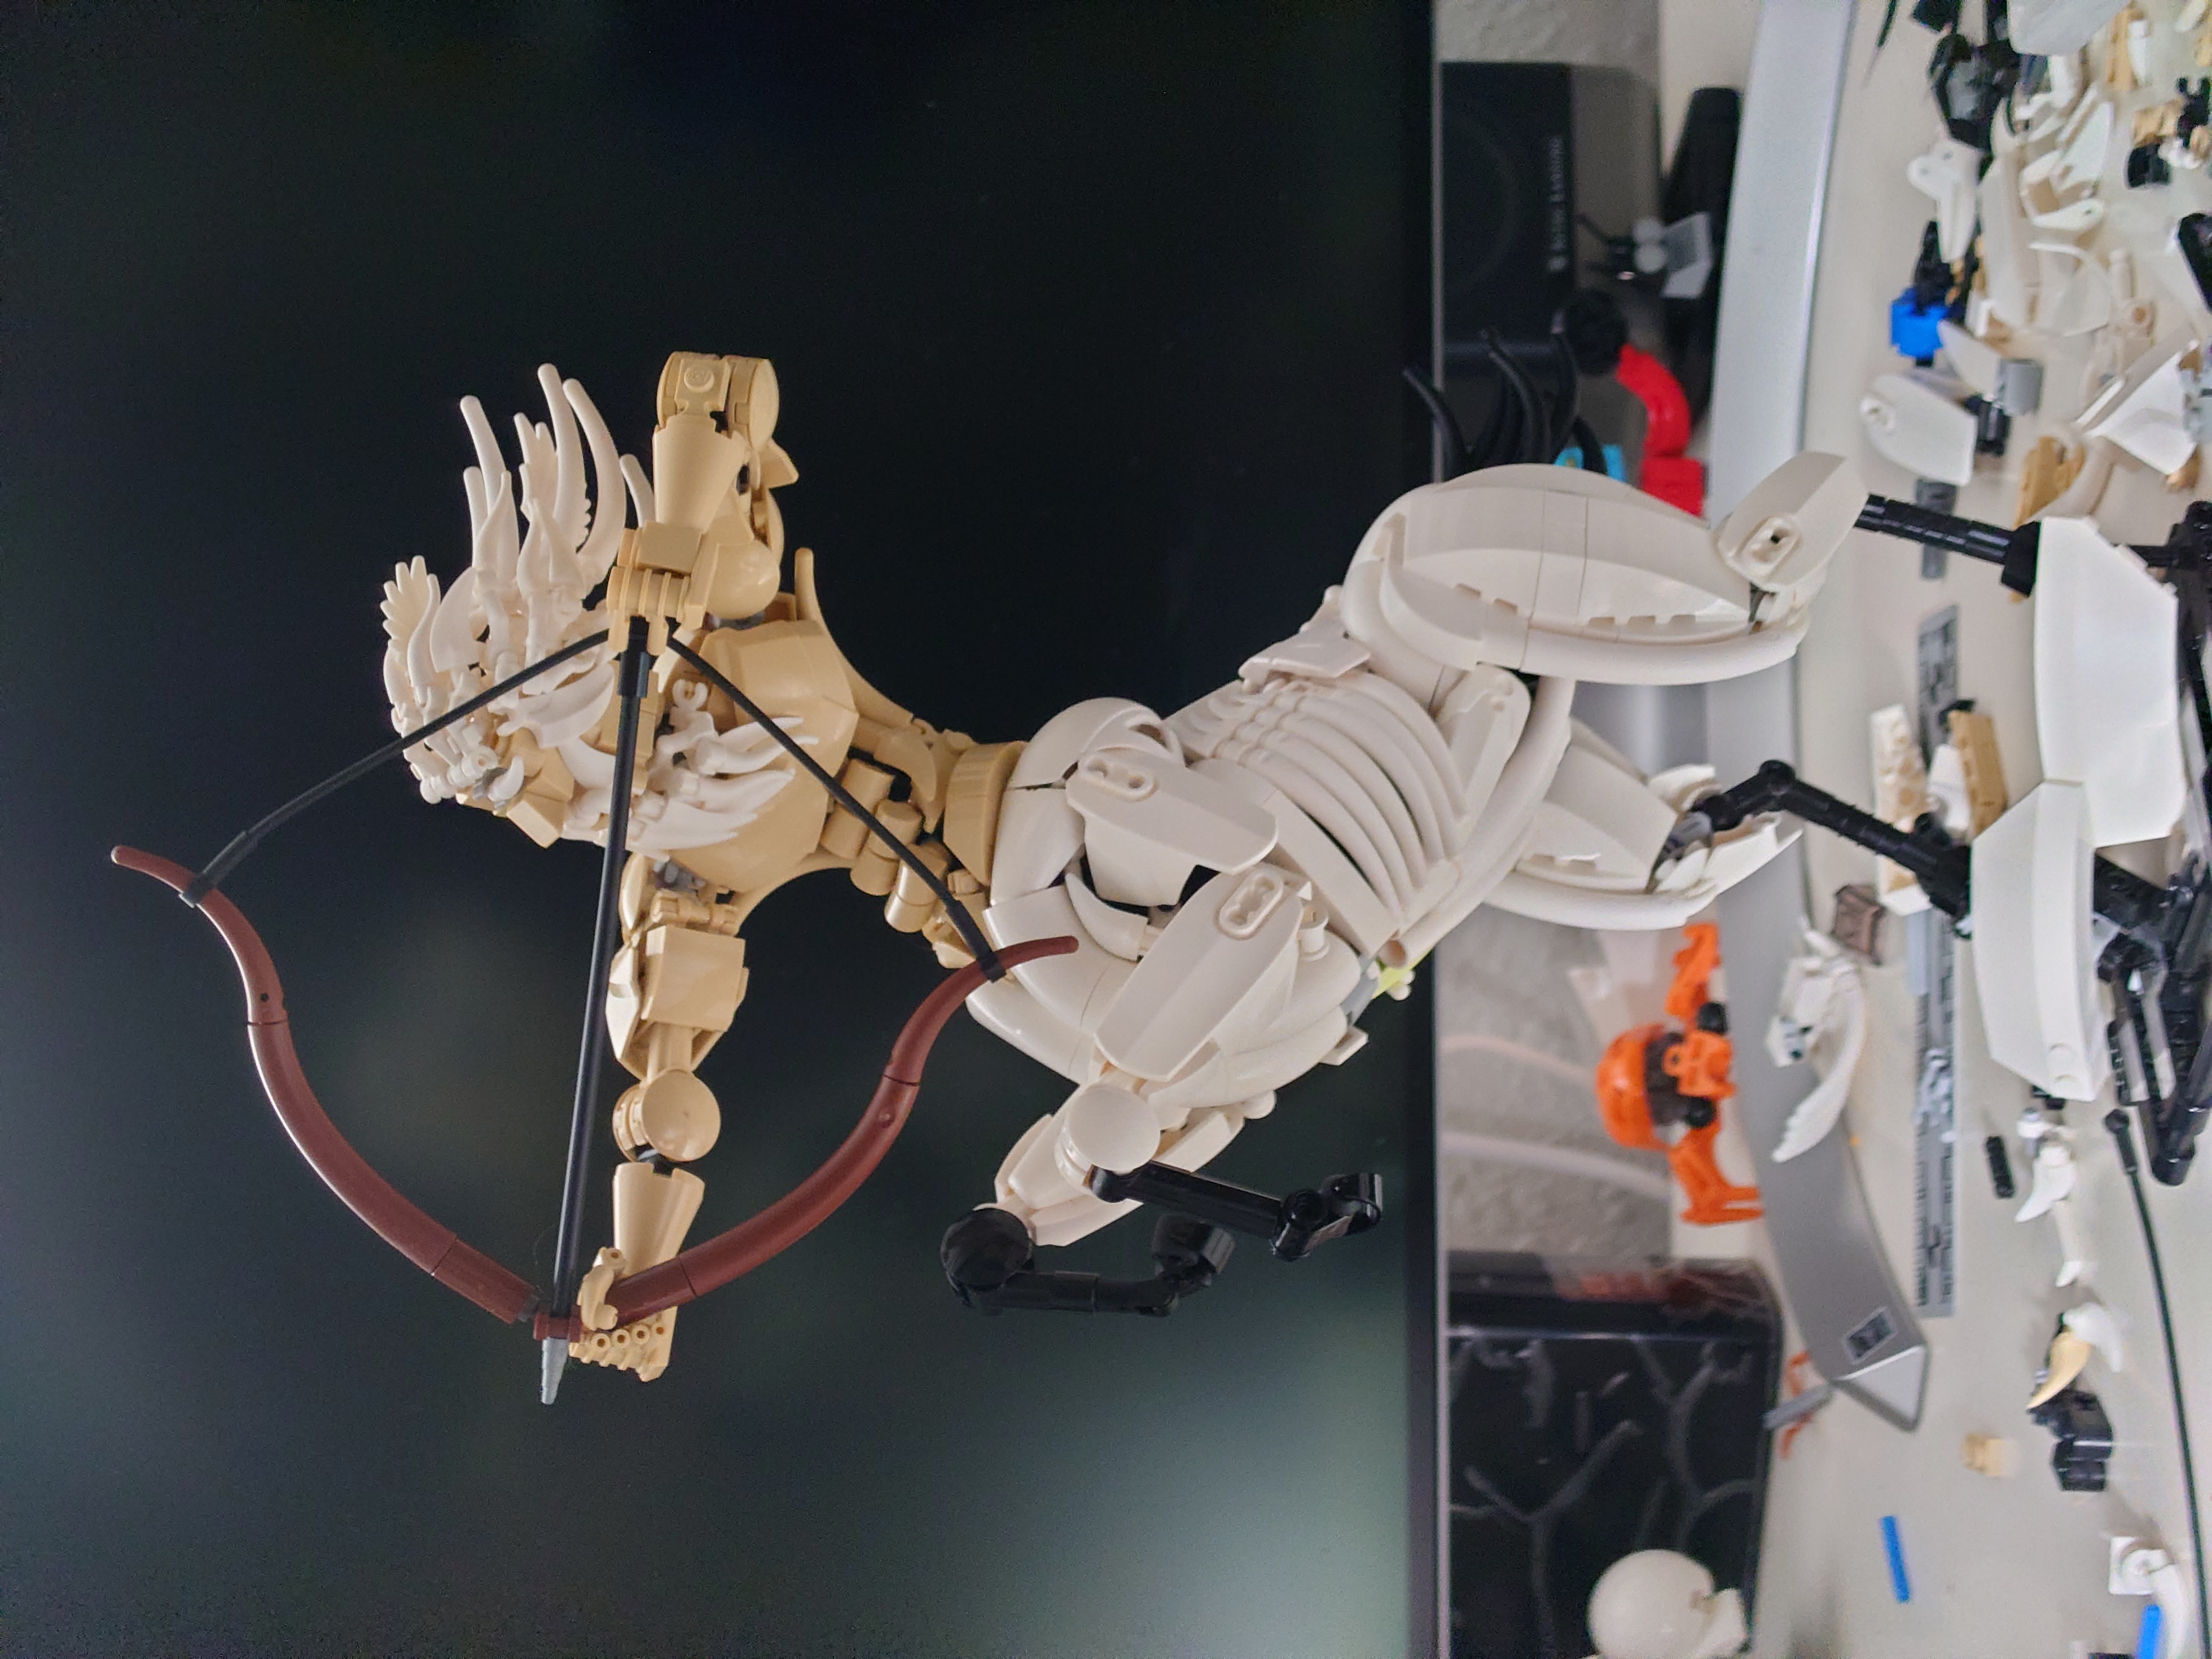
The midsection was frustrating to build. I had really wanted to avoid the dino tail end spam for the ribcage area because while the texture and curves feel reasonable at a glance, they don’t quite catch the shape of a real ribcage, at least not in the simplest configuration I use here. I messed with some more complicated assemblies but that just made things worse, so stacked dino tails it had to be. In the end, it's a been a staple techinque for ages for a reason. And the dino tail mid sections used on the underside for the stomach were a real pain to connect, let me tell you.
The one part interaction I want to note here since it was such a fun little coincidence and not at all intentional is the way the edge of the big hero factory paw piece slots into the stud cut out on the 3x3 quarter-round slope. Very satisfying. You can't even really see it well in any of these photos, sorry.
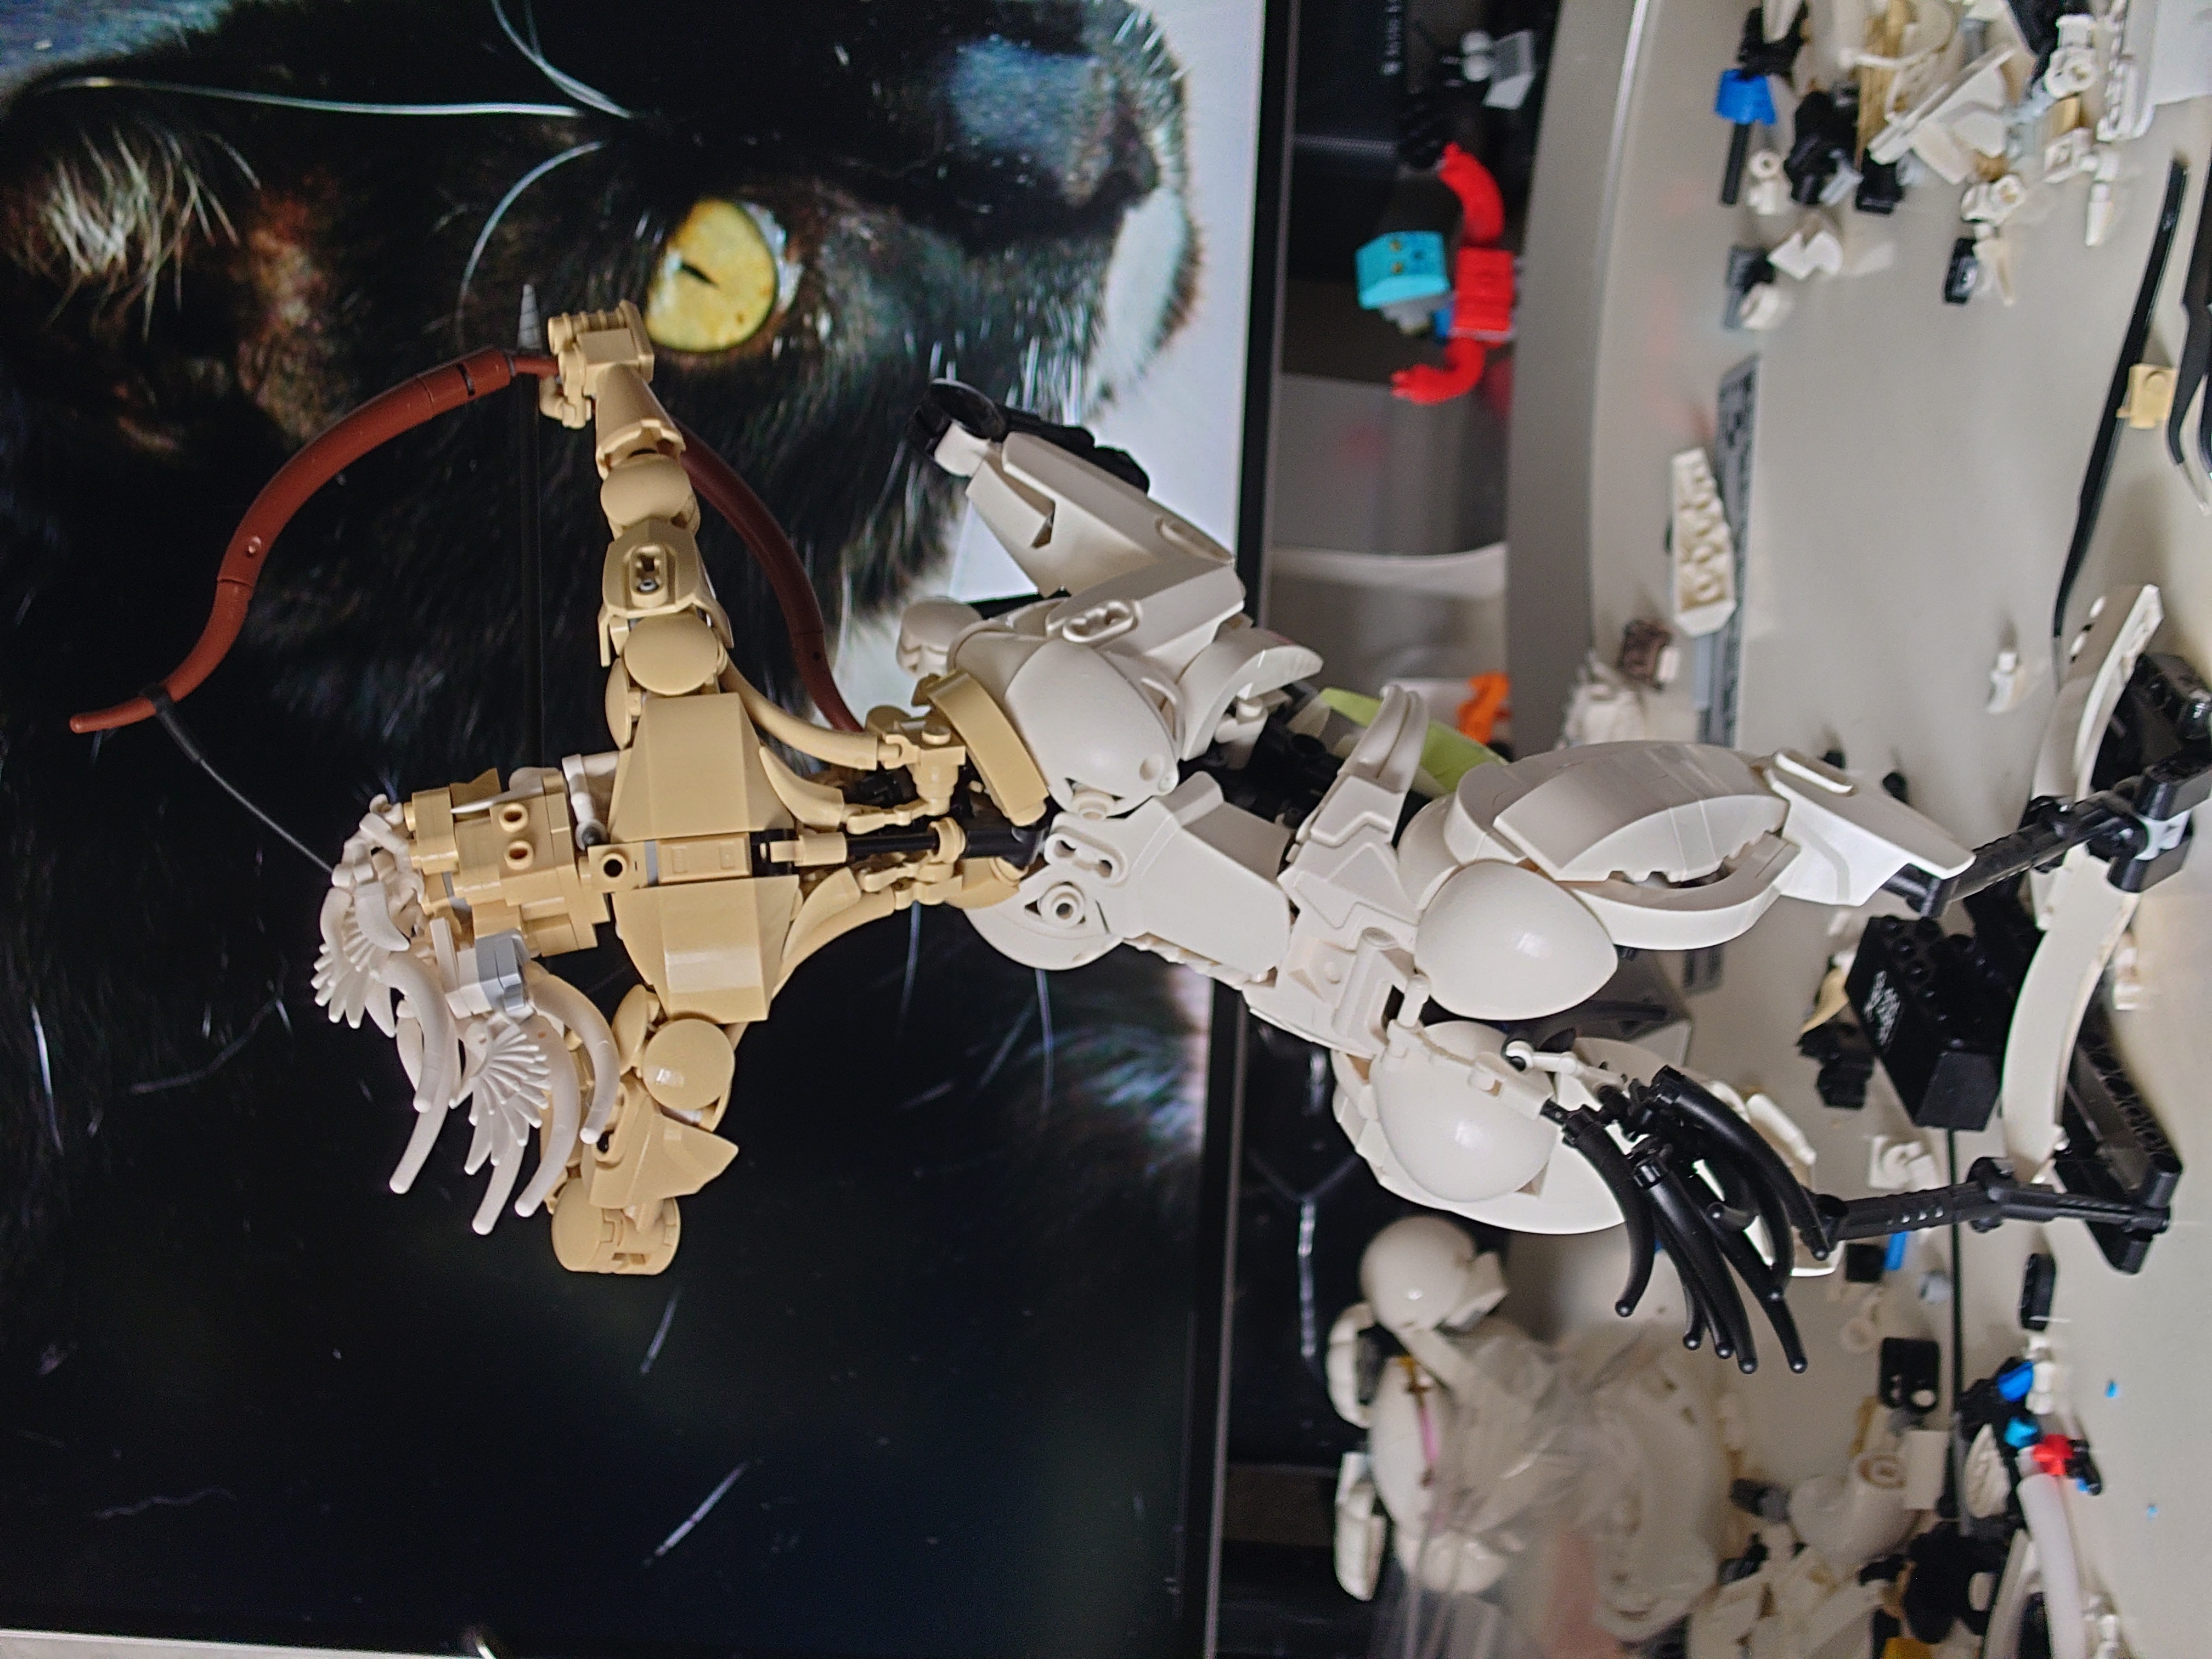
And that (almost) finished up the centaur! The tail wouldn’t be finalized until after I finished the base.
And so, onto the base. This was only my second attempt at building a base for a character MOC so this was a fun exercise in doing something new. I took inspiration from the great rockwork done by Grant Davis here and focused on big wedge slopes at interesting angles and just kinda fit them together in a way that implied the edge of an outcropping at the front while covering the technic beams as best as I could, filling the gaps with a layer of leaves. Turned out pretty well.
I needed to add a tiny bit of elevation to the front to fit the rockwork the way I wanted and also to tip the centaur pose back just a touch to look a little more convincing as if it was at the apex of its rearing trajectory. After finally adding the tail, though, which was quite heavy and also cantilevered pretty far away from the base, I actually found my center of mass had moved too far back when combined with the extra tip I had induced on the base and I had to add a weight brick inside the base towards the front. At a later date after the photoshoot, I also extended the base further back for added stability (helpful but unfortunately not adequate for surviving little table shakes at cons).
One final amusing note is that, as you might notice in these WIP shots, I actually built the whole centaur mirrored from how he’s supposed to be. The bow should be aimed to the viewer’s right, but I built it aiming left. I didn’t notice this discrepancy until I was almost done, at which point I really couldn’t be bothered to rebuild it in mirror image. Instead all my publicly posted photos of the guy are mirrored in post.
Before you go, check out the rest of the collab!


