TXN-4 "Texan" Developmental Testing and Evaluation
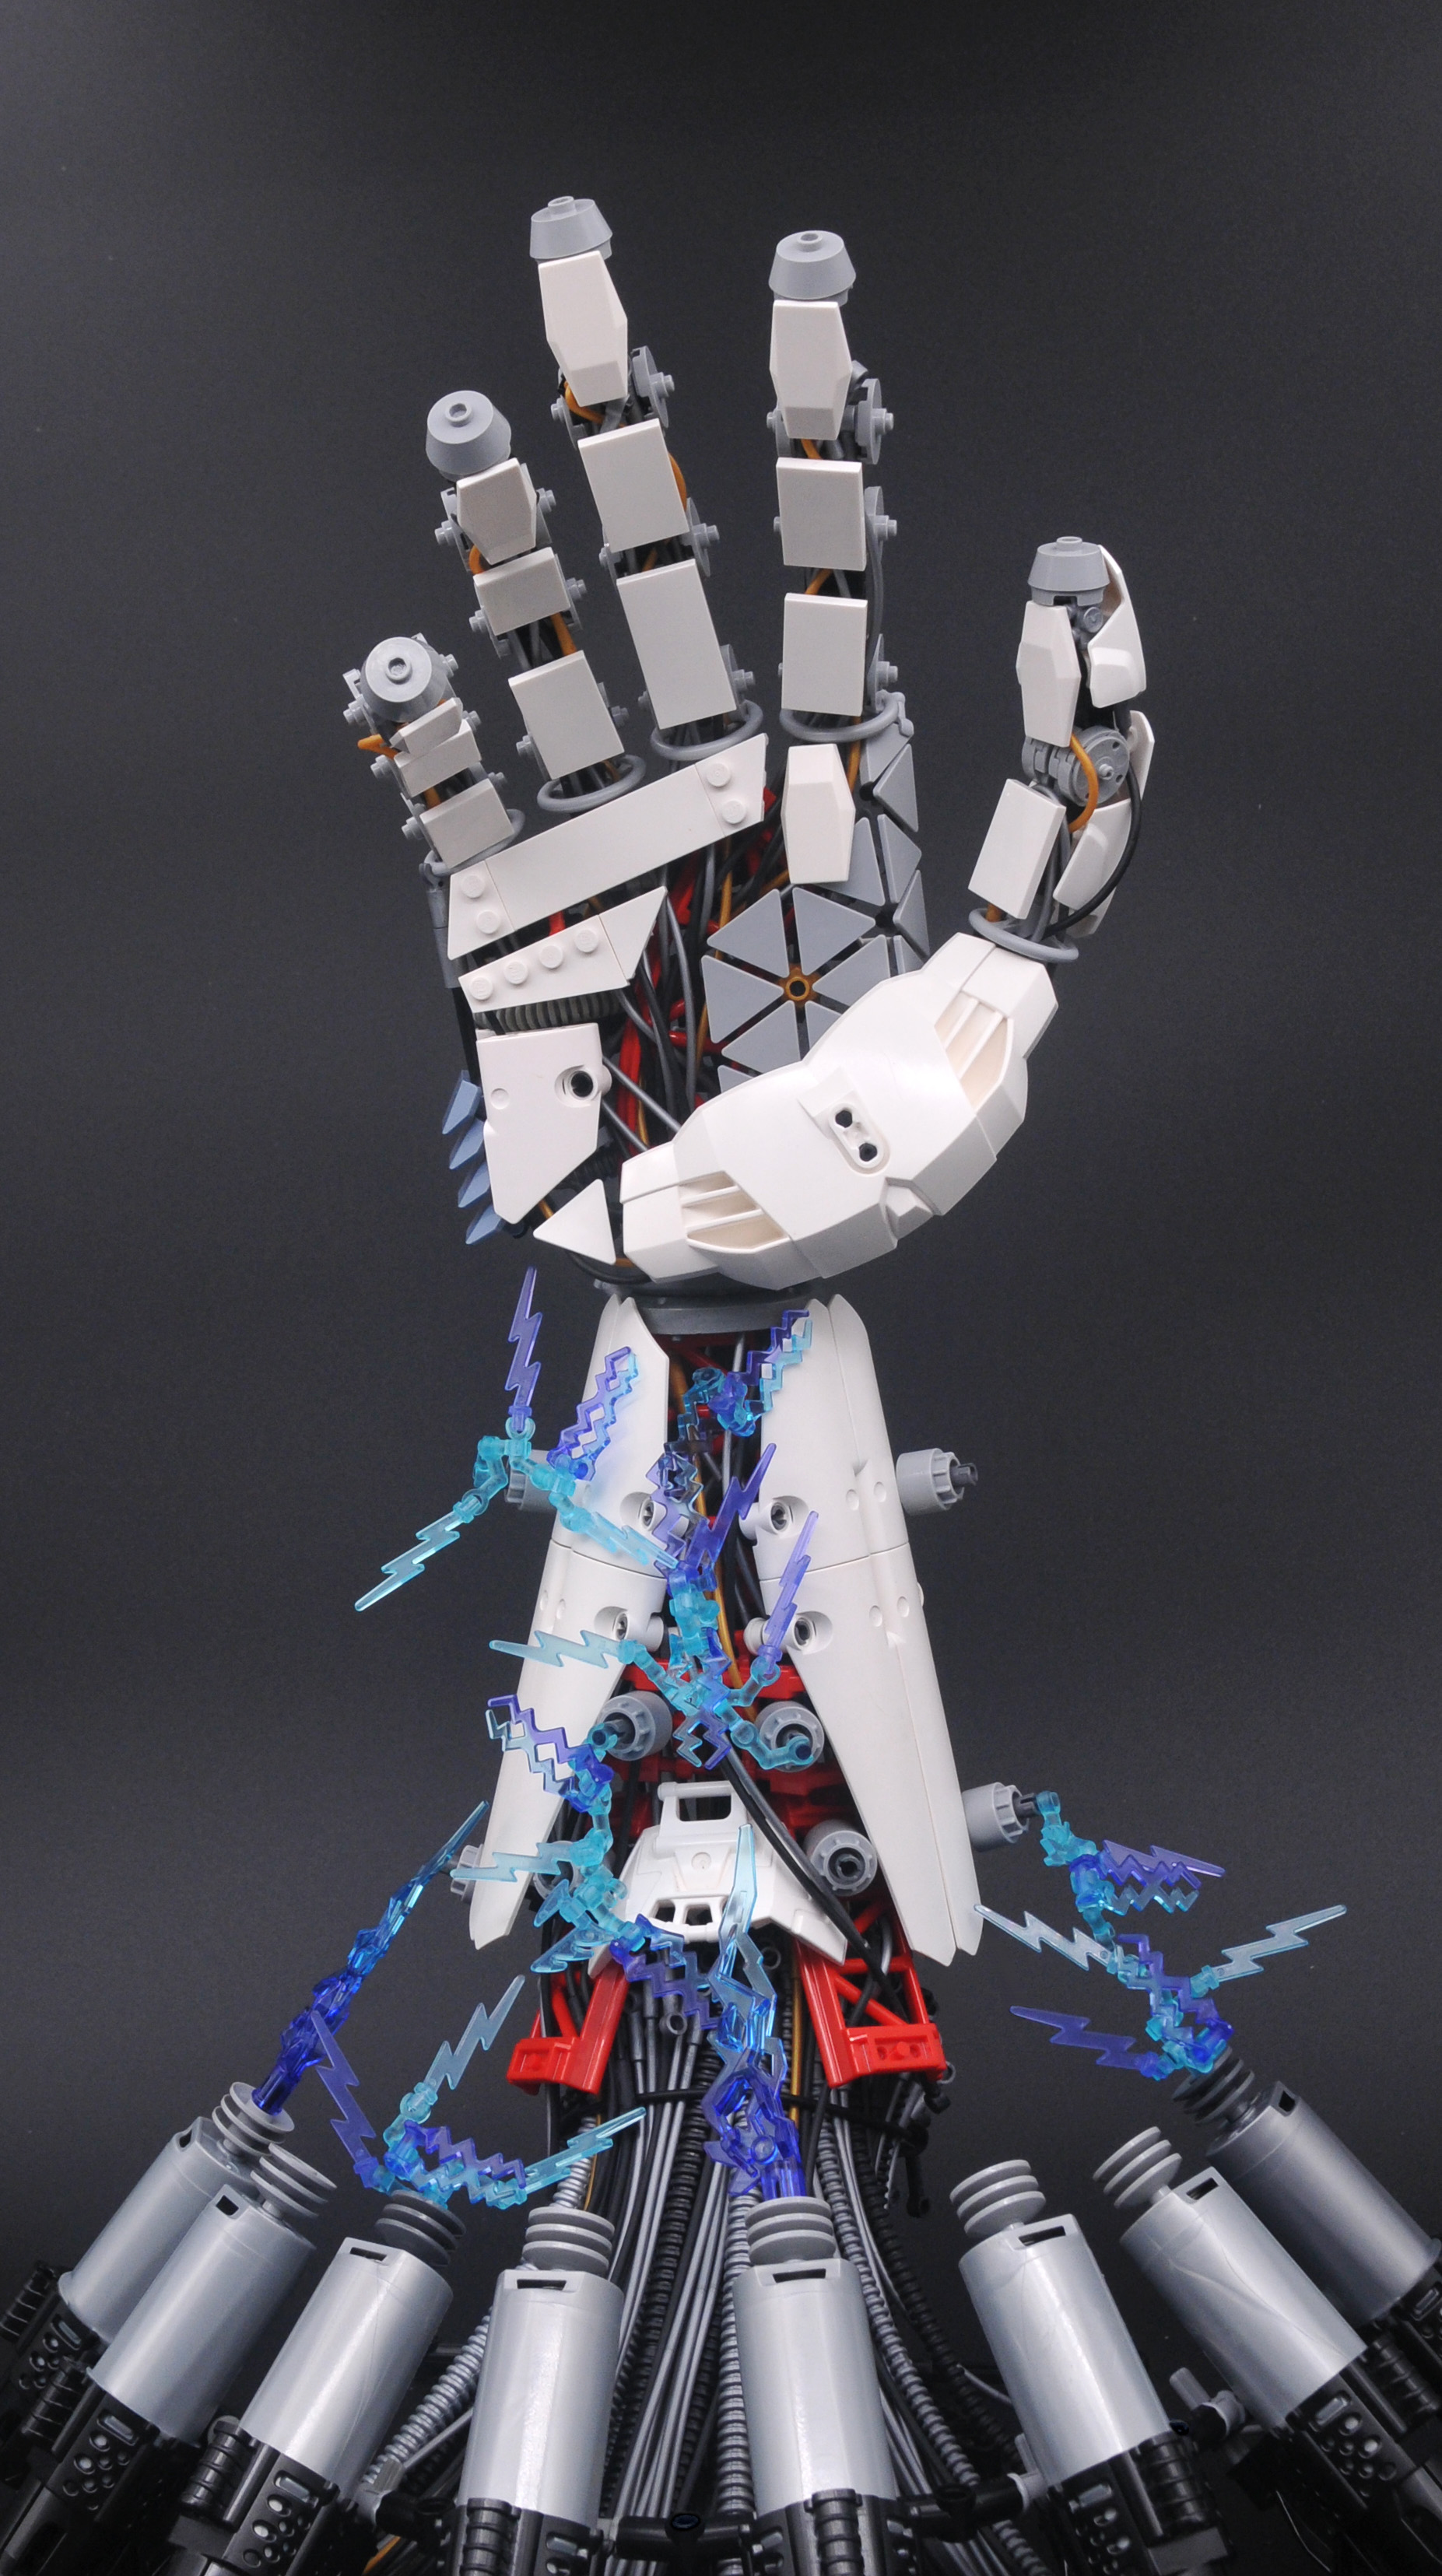
Time for round 1 of Bio-cup 2024. Round 1 is when things get serious so I couldn't slack the way I did in the prelims. My theme to build to was "electrical energy," which felt like easy mode, to be honest. Electricity is so ubiquitous that the door was open to basically any kind of modern/future technology, and in my opinion that's the realm that Lego, particularly Bionicle-based, excels in. So I just had to think of neat tech to build, and being a big fan of sci-fi with human technological augmentation, I pretty quickly settled on a big, approximately life-size hand as the focus of the build. Hands are very evocative for all sorts of biological and cultural reasons, so it would make for an impactful image. I did a quick browse for inspiration and found this great drawing by Jacob Stanton. You can see that while I didn't directly replicate the art, it served as the basis for the design language with the large smooth cladding layered over a structural metal tube/bar lattice over the internal wiring and actuators.
It ended up being a pretty smooth build all things considered. The initial sketch model included a user controlling the massive (in comparison) hand through a glove but I didn't have time for that. The name "Texan" is actually a holdover from this original idea, playing idea of things being big in Texas. Later I did consider framing the photo in perspective with a pair of hands on a control board in the foreground, but I didn't have the motivation for that, either, and I was assured it would only distract from the spectacle of the hand, anyway. This theme of lacking time that you may have noticed was partially because I went to Brickworld Chicago in the middle of the round and lost a whole weekend to that shindig. Great show, highly recommend going if you can.
One convenient side-effect of building a life-size hand was that, wouldn't you know it, I have hands, too! Life-size ones, even! So I had a very easy and reference at all times for the proportions and didn't have to keep trying to match a flat image on a screen, I could just hold the Lego next to my real hand.
I started building proper with the curved roller coaster track as structural lattice and the big Hero Factory chest for the thenar muscle, both of which do a reasonable impression of the shapes I needed on the palm. I filled the area between with that nice triangle sign texture and made sure to get it wrapping around a bit for extra satisfaction. And to make it less obvious that the back side was totally uncovered.
From there, I knew I wanted to have those gaps between cover plates and I wanted the roller coaster track visible with wires running through it, similar to what you see in the inspiration image, so I just grabbed parts and started approximating the shape I wanted. The vents just added an extra bit of texture to that side of the hand. The internals/backside are extremely poorly designed but I wasn't too concerned about that, there was plenty of room to play with and outside of the central column nothing needed to support much weight, so optimization wasn't a concern from any direction.
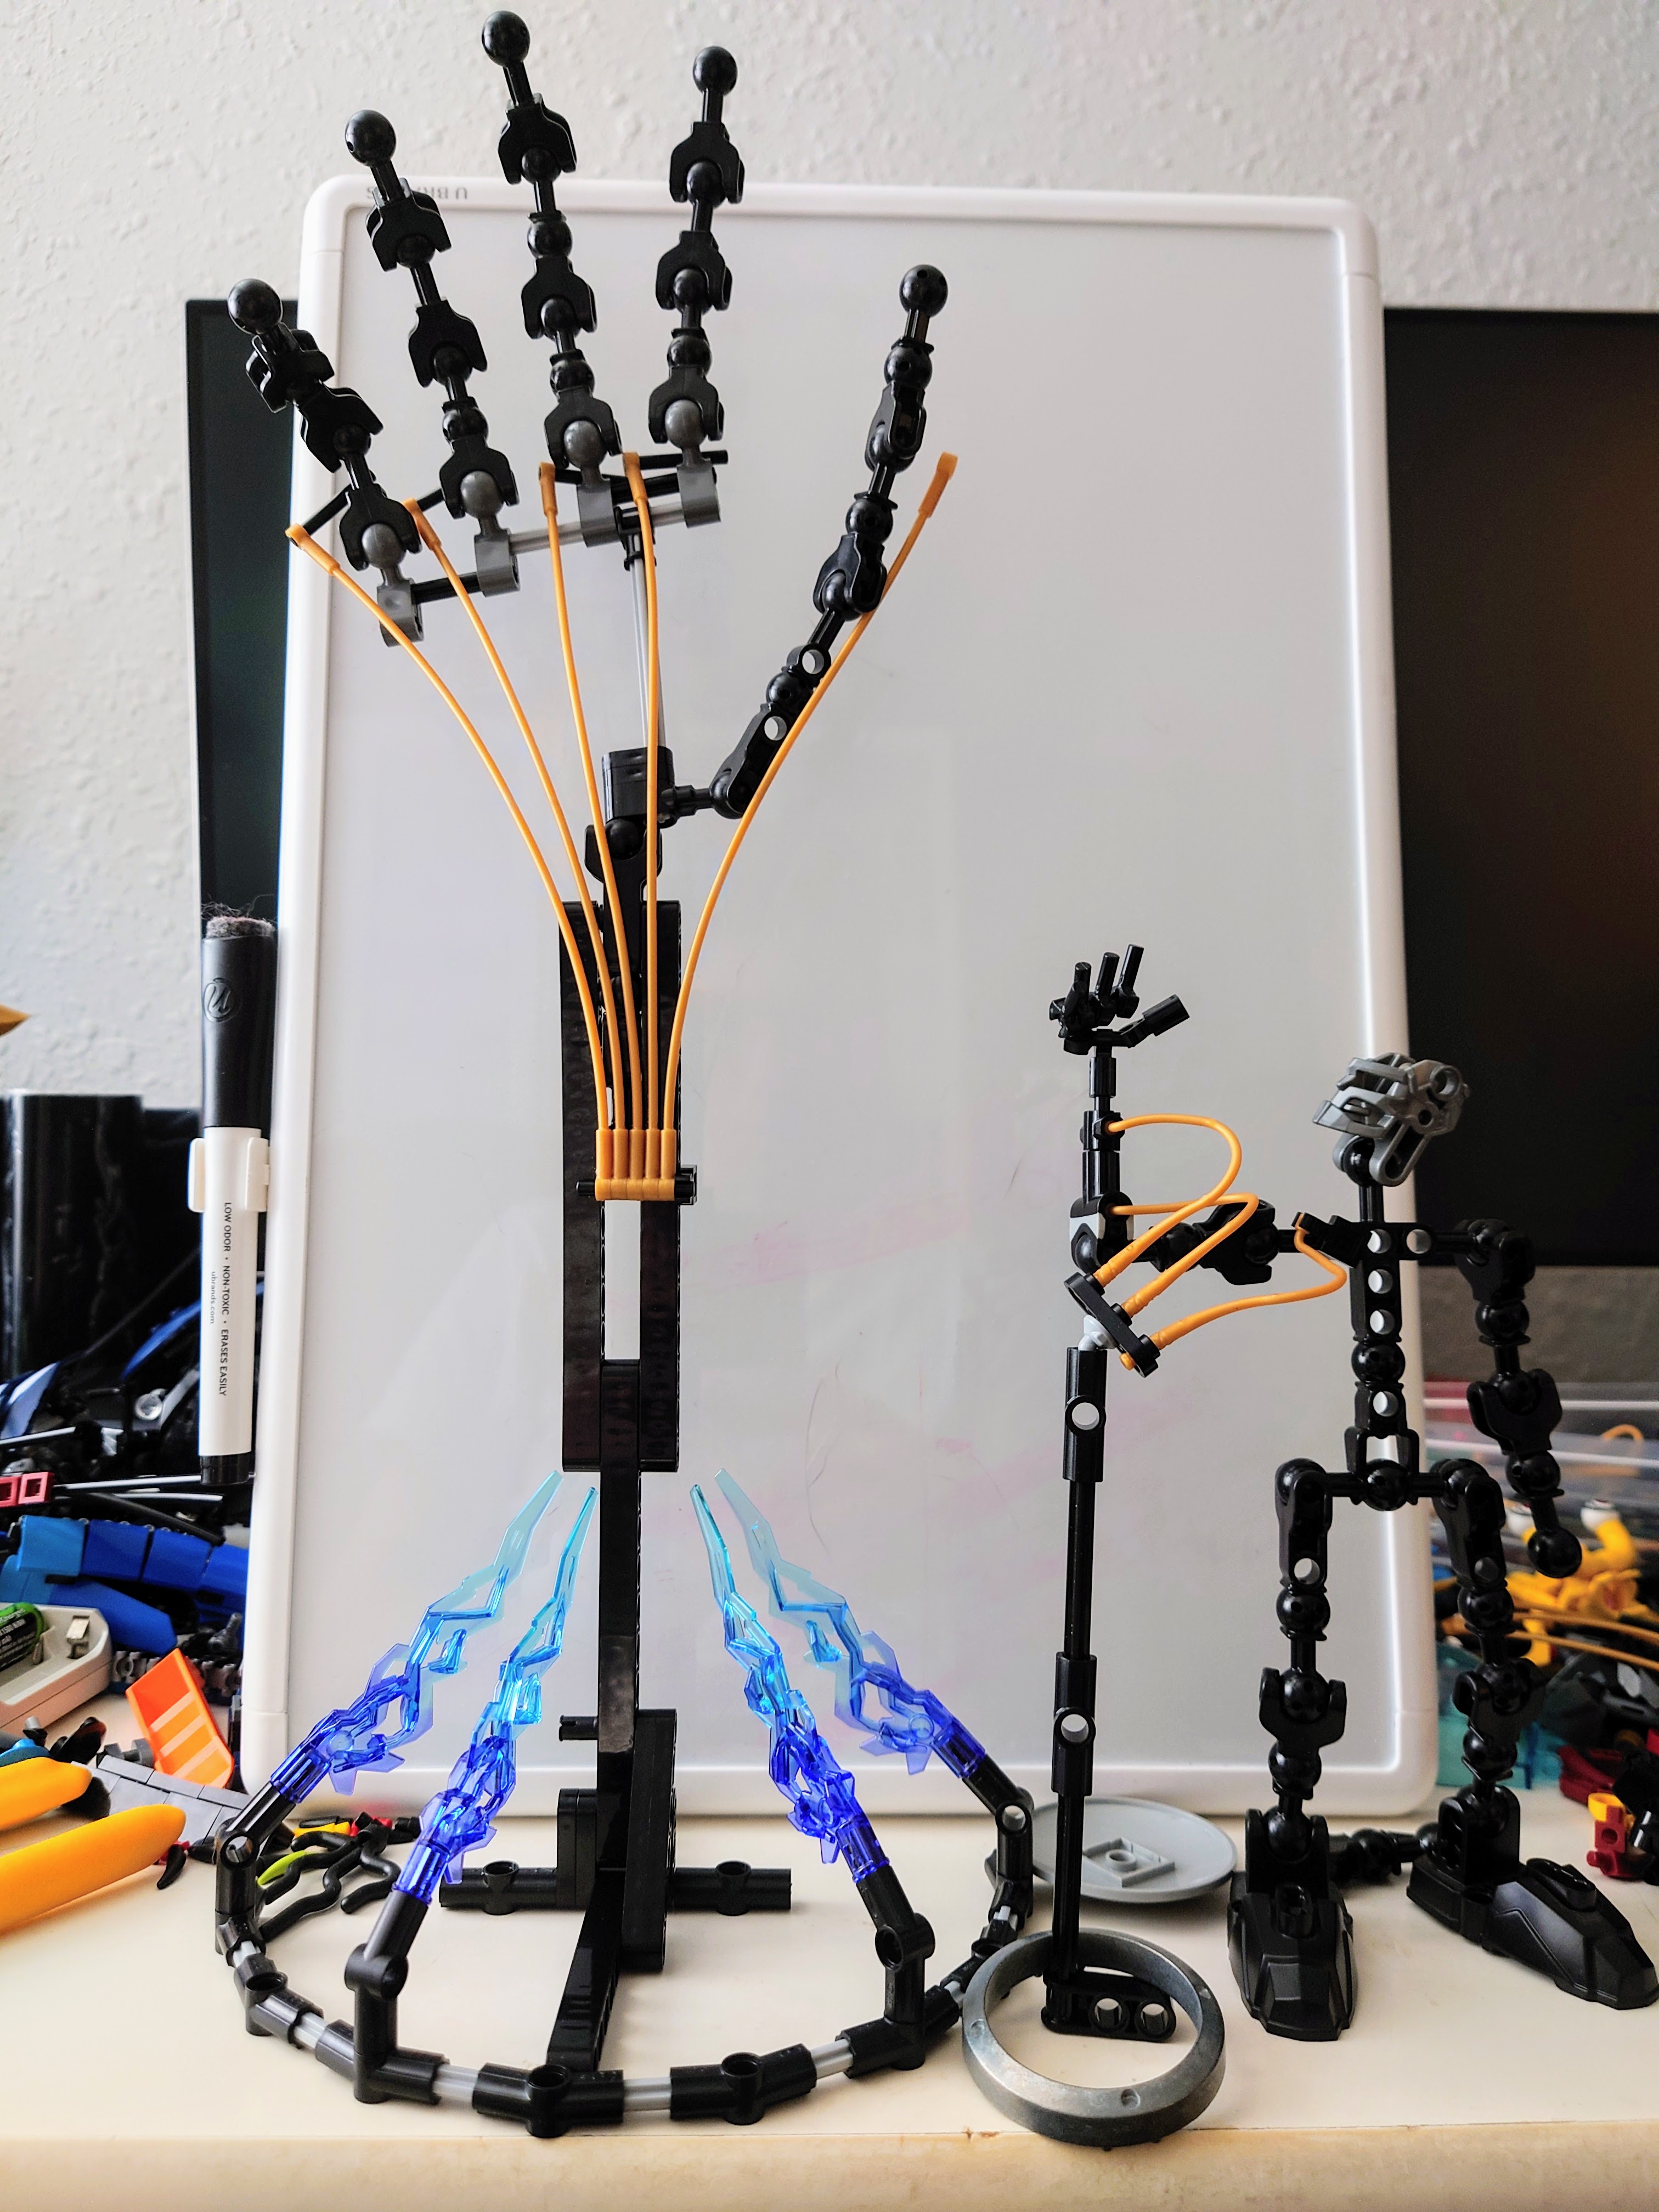
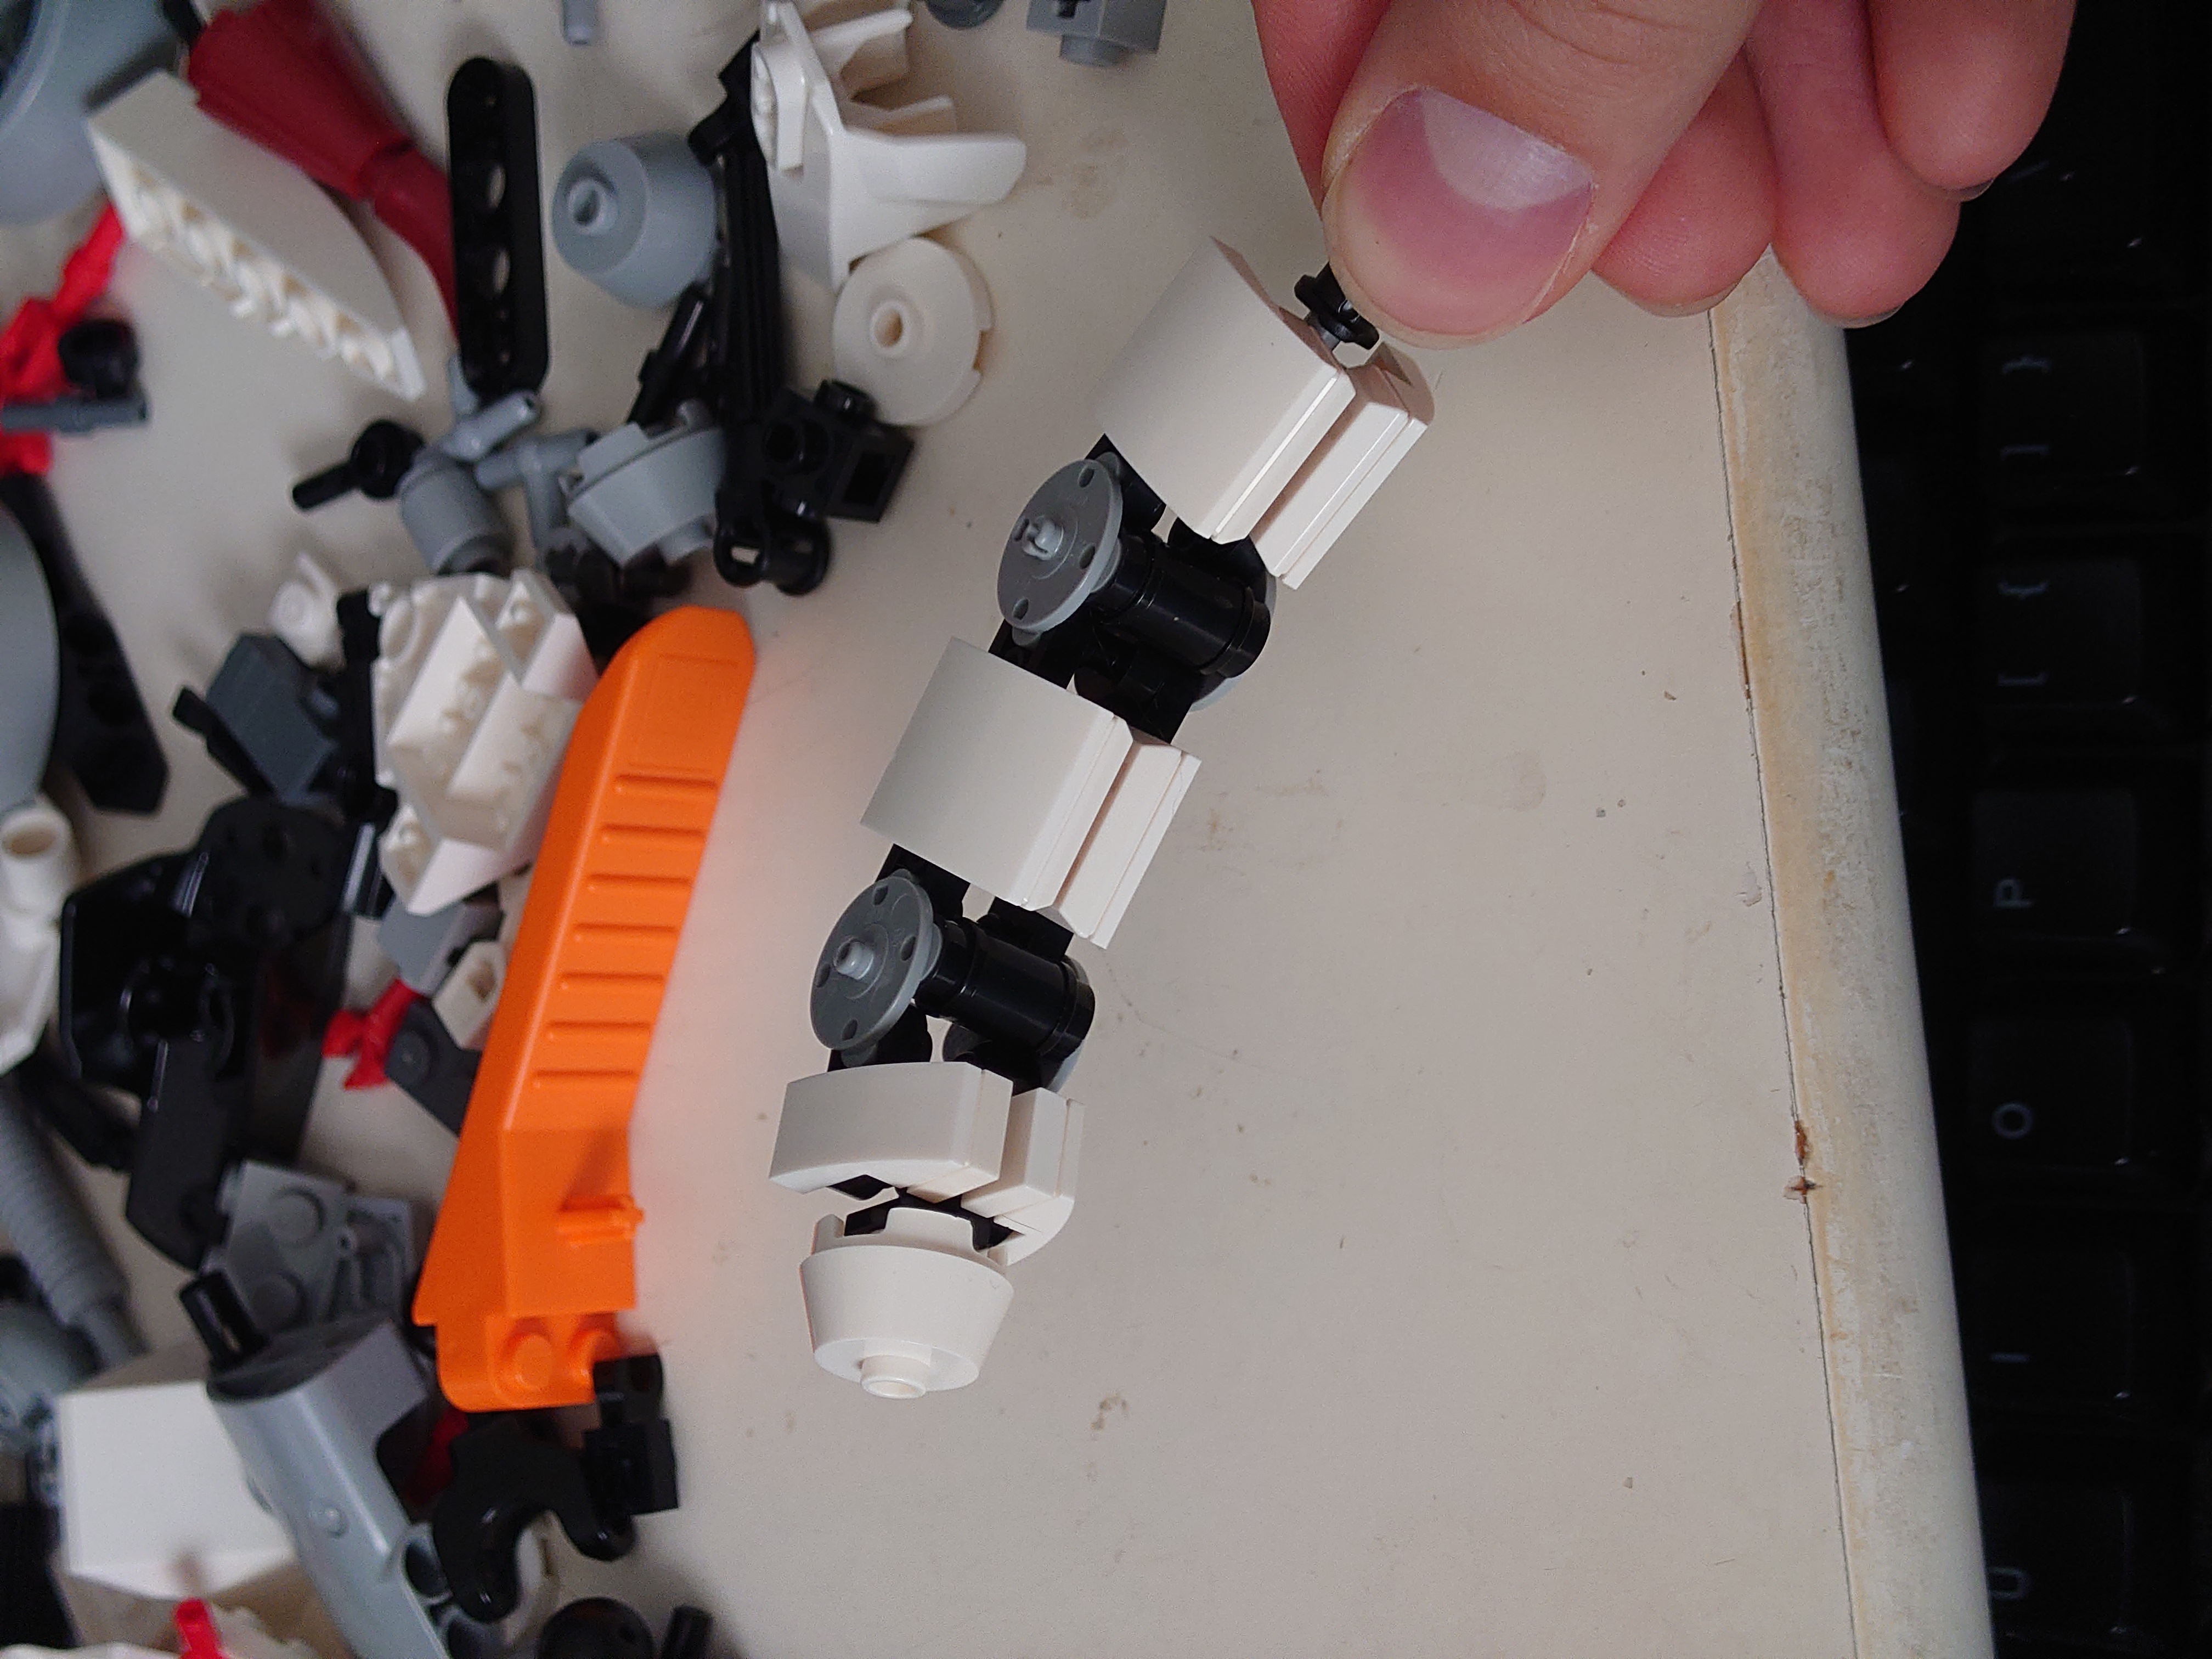
Once I had the palm I turned my attention to the fingers and knuckles. I actually went through 4 or 5 visually distinct finger designs before settling on the one used, and also went through a few visually equivalent versions of the final finger optimizing for the strength and space needed to accommodate the ziplines and whips. My favorite finger design is pictured below, but it had no free internal space to accommodate the wiring which I had deemed crucial.
As seen in the WIP photo, I didn't actually thread all the ziplines and whips through until almost the end of the build, instead moving on to the forearm.

Things kinda started to fall apart here. I thought I had it figured out pretty ok until I started adding the wires and nothing was really strong enough to hold those pressures. Just kinda persevered. I also thought the mass of wires and tubes at the bottom would be better, ultimately I think fewer would have been fine and just letting the electrical arcing take all the visual attention in that area would have been easier and just as effective. One small detail that I made sure to include is that each finger got one gold wire going up through it, and thus there are 5 gold wires, on from each finger, going through the palm into the forearm.
The Midak blaster ring was also just a quick and easy solution to the need for a ring of some kind of technological "test rig" which also very intentionally hid the base area: they're big and I have a lot of them and they have the right aesthetic. A more involved support structure would have been preferred. Threw a bunch of electrical energy elements at them to drive home the fact that it's all "powered" by electricity.
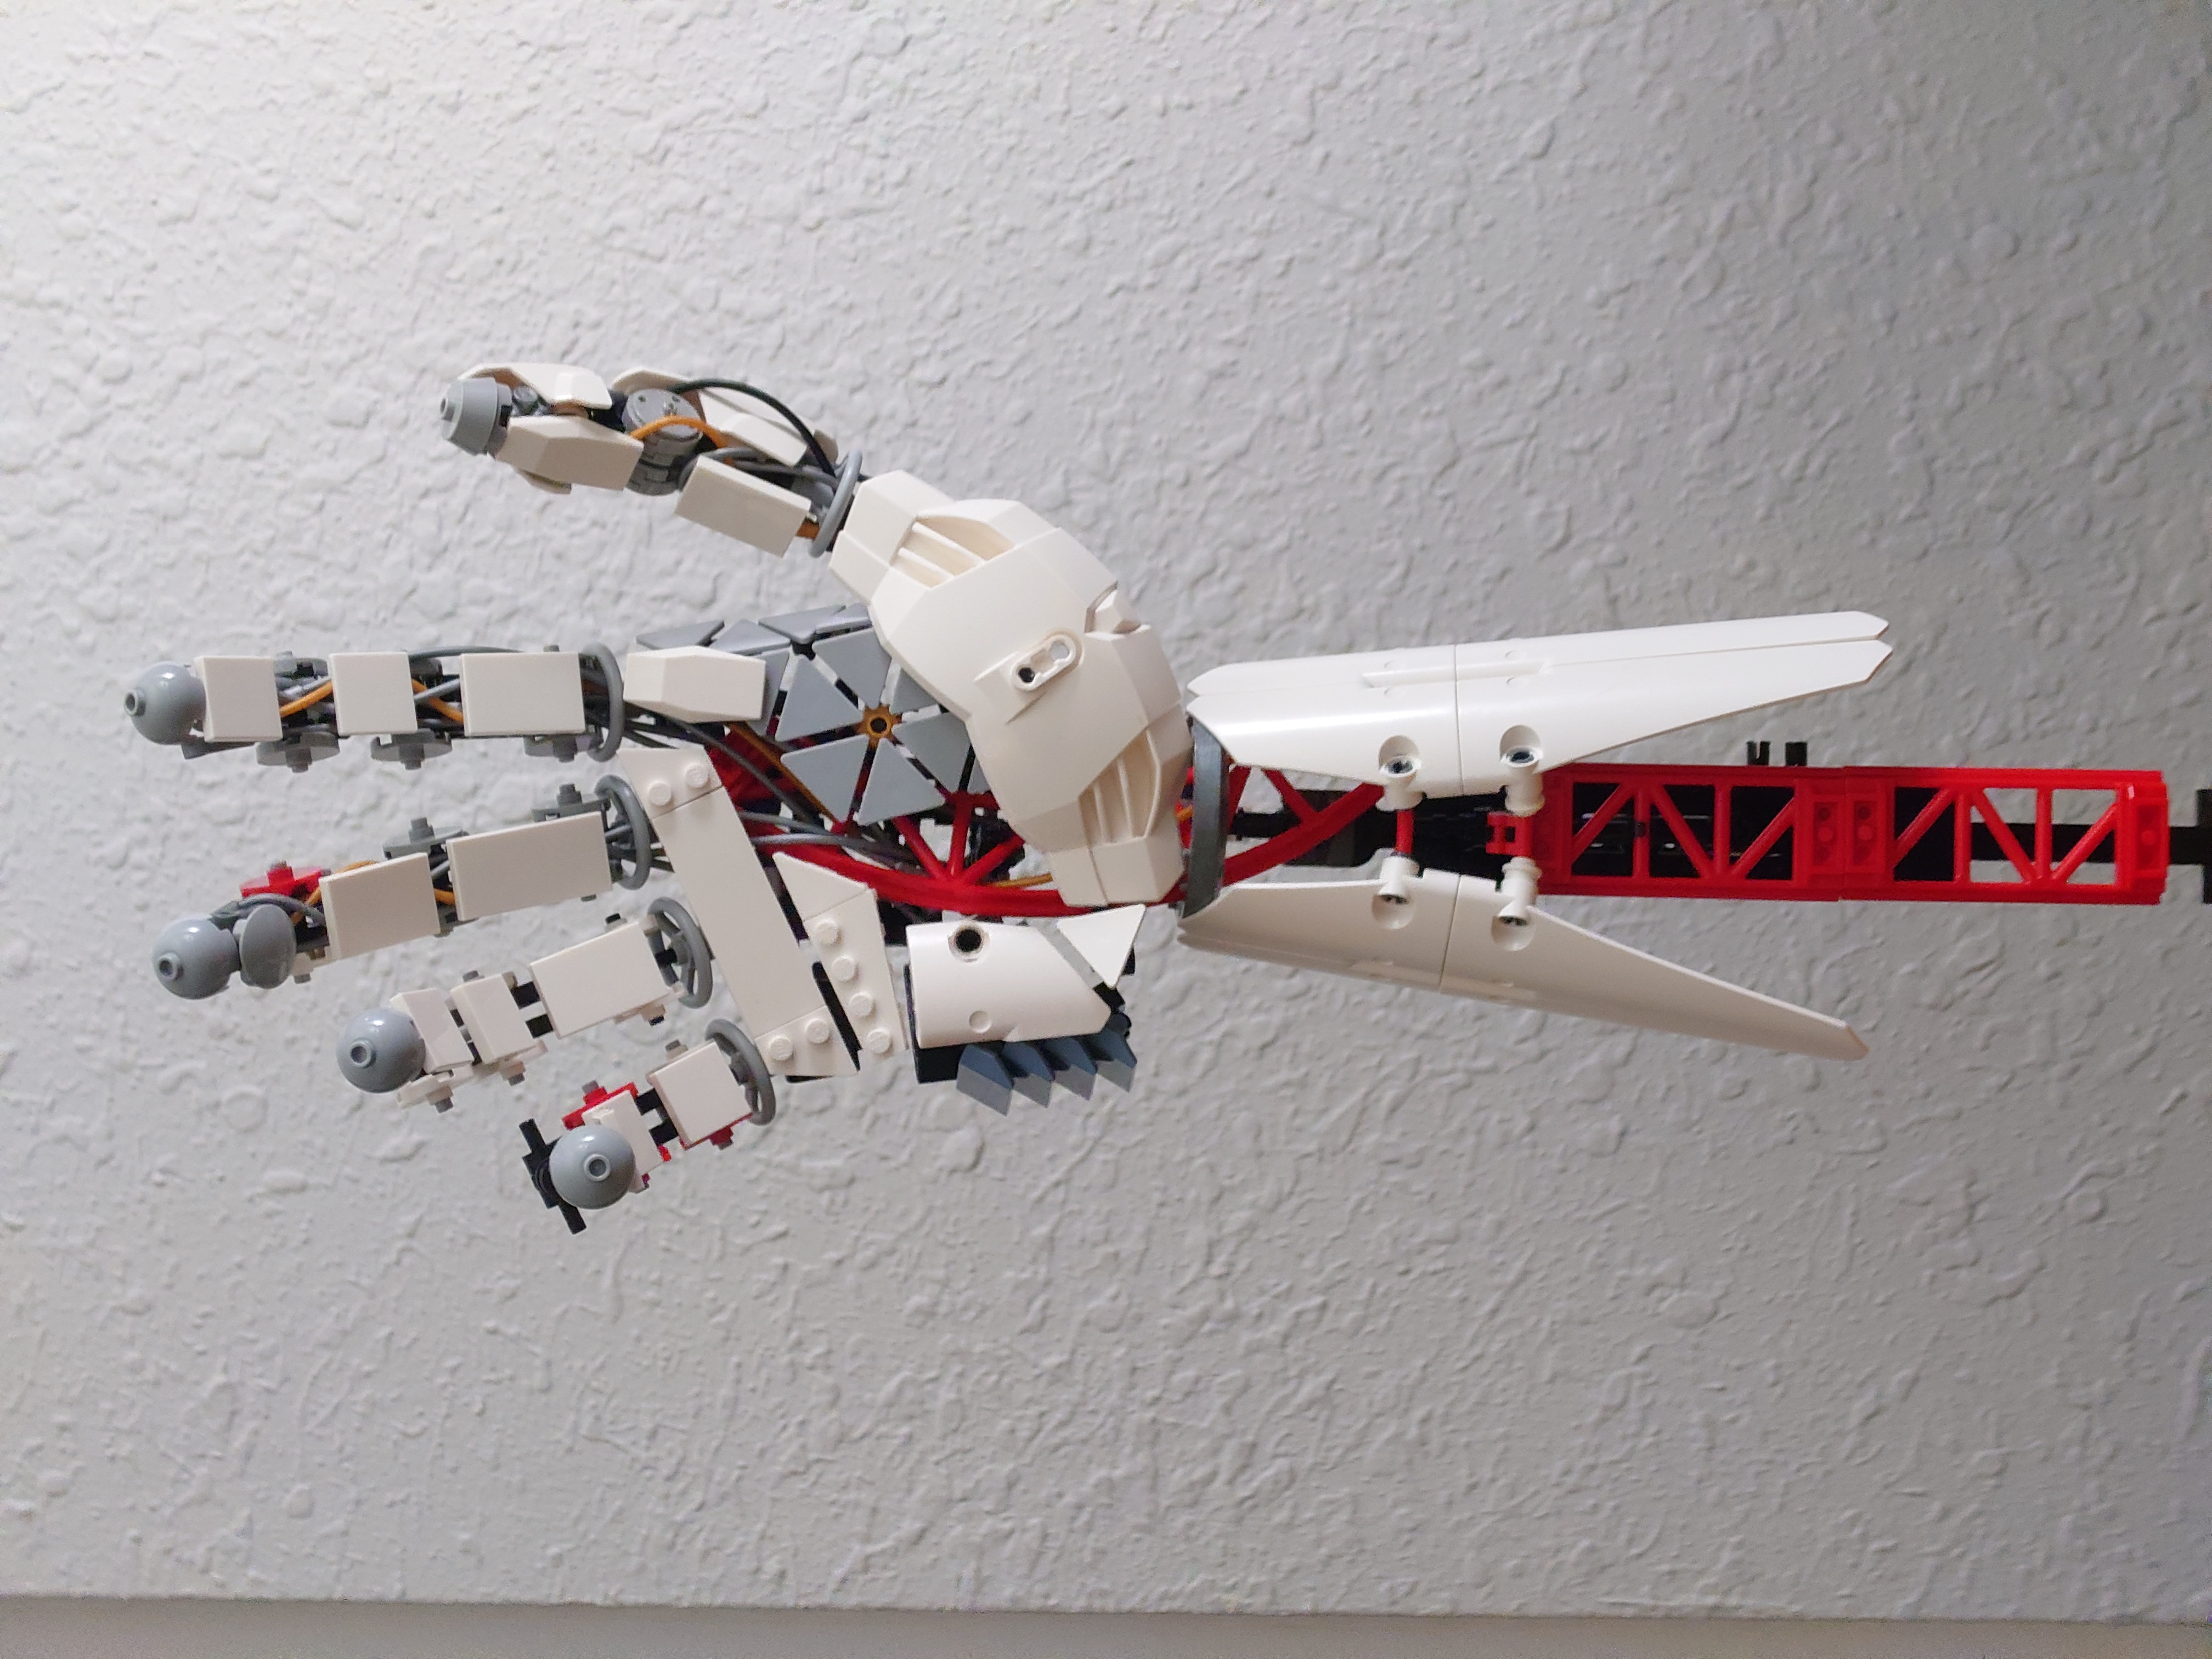
One fun thing was figuring out the wrist. I really liked the idea of an obvious rotation point on the wrist, but I had that big bit of curved track extending all the way down into the forearm so I needed to build around it. There aren't a lot of Lego pieces that are rings with totally empty centers and I ended up using Ninjago spinner weights which I had recently seen somewhere (sorry, forget where). It ends up being hidden in the shadows of the main picture, but I really like the beveled edges of the two rings against each other.
And so, your final reward for reading to the end is a photo of the gorgeous backside where you can actually see those rings (and all the other shit).
